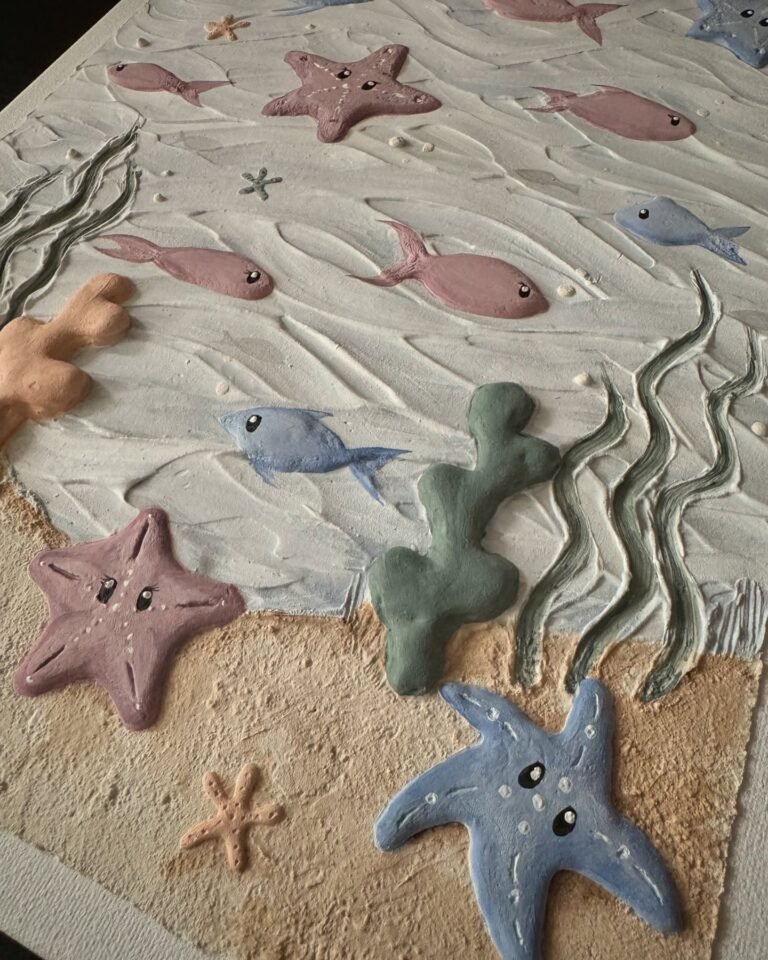
DIY wall art canvas projects start simple. You take a plain canvas, add layers with joint compound, and finish with soft paints. These pieces turn blank walls into spots that feel lived-in and calm, especially when you stick to neutral tones.
Textured wall art pulls from old painting tricks but fits right into today’s homes. It gives depth without clutter. I love how it nods to nature’s rough edges, like tree bark or sand dunes, but keeps things soft and easy on the eyes.
Here is why it works so well for busy spaces. The texture catches light in quiet ways. Neutrals like warm beige or cool gray make rooms breathe. No bold colors to fight your furniture.
Key Takeaways for Your DIY Textured Canvas Wall Art
What makes DIY canvas textured art so great for walls? It adds interest where flat paint falls short. You get a handmade feel that store-bought stuff can’t match. For women like us who want homes that reflect real life, not catalogs, this hits the spot. I remember fixing up my first rental kitchen. Walls were builder-beige, boring. One textured piece over the sink changed everything. It felt like the room had soul.
Trends lean toward calm right now. People want walls that soothe after long days. Neutral colored wall art does that. Think layers of cream over soft ash. Textured canvas amps it up. The bumps and ridges play with shadows. It makes neutrals pop without screaming.
From what I see on design sites, this style draws from Scandinavian roots. Clean lines, natural materials. But you twist it your way. Add a hint of linen texture or pebble swirls. It ties into bigger rooms without dominating.
One guide points out how neutrals ground a space. They let other pieces shine. Your sofa, plants, rugs. Textured canvas sits back but still draws the eye.
Yes. You don’t need art school. I started with zero skills. Just follow steps. Basic supplies mean no fancy tools. A $5 trowel from hardware stores works fine.
Blogs show folks upcycling old paintings. Scrape off the old, add compound. Dry, paint. Done. It builds confidence quick. Mistakes? Sand them out. No big deal.
Next steps. Gather your stuff first. That keeps things smooth.
Materials you need for DIY wall art canvas projects, keep it cheap and simple. I stick to hardware aisle finds. No need for pro-grade paints.

Optional: comb or fork for patterns. Things from your kitchen drawer.
Total? Under $30. Shop sales or use what you have.
Let’s break it down. Joint compound gives that raised feel. Like frosting on cake, but for walls. Mix a bit of paint in before spreading. Saves a step.
Paints dry fast. No waiting weeks.
Now, the fun part.
Step-by-step guide: How to create basic textured canvas art. I walk you through one base method. Swirls for a soft start. Builds from there.
Prep your space. Lay down that drop cloth. Tape edges if your canvas has a frame. Keeps mess off wood.

Work in a garage or kitchen. Ventilate if paints smell strong
Prime the canvas. Brush on gesso thin. Let dry 1 hour. Skips cracks later.

If it’s an old painting, wipe clean. Scrape loose bits.
Mix compound. Scoop 1 cup into a bowl. Add 1-2 tablespoons paint. Stir to creamy. Taupe for earthiness.

Adjust. Too thick? Splash water. Too thin? More compound.
Spread it on. Dip trowel. Start center. Swipe out in arcs. Build layers. 1/4 inch thick max. Let first layer dry 30 minutes, add more.

For swirls, twist the knife gentle.
Add patterns. While wet, drag a comb through. Vertical lines for calm. Circles for flow.

Step back. Eyeball balance.
Dry full. 24 hours. Fan helps if humid.

Sand light. Buff rough spots. Wipe dust.

Paint over. Two coats dry-brush style. Dip brush light, wipe excess. Lets texture show.

Dry 2 hours between.
Seal if you want. Clear spray. Protects from dust. Hang up.

That’s your base. Takes 2 days total, mostly waiting.
Sand them once dry. No sweat. Repaint that spot.
Wet fix: Wipe with damp sponge quick.
On to ideas.
Each uses the base steps. Swap patterns.
Idea 1: Gentle Swirl for Bedroom Calm

Swirls mimic water ripples. A nature canvas wall art is perfect over bed. Use dove gray compound. Top with off-white dry brush.
Why it works: Flows with linens. Adds depth to low light.
Hang at eye level. Pair with wood nightstands.
Cost: $15. Time: 2 days.
Read: DIY Texture Paint: Add Depth to Canvas & Walls With Texture Techniques
Idea 2: Pebble Stack for Entryway Welcome

Dab compound in dots. Stack like stones. Taupe base, cream top.
Ties to nature paths. Grounds your front door.
Scale up. Two side by side.
From one tutorial, stack varies height for interest.
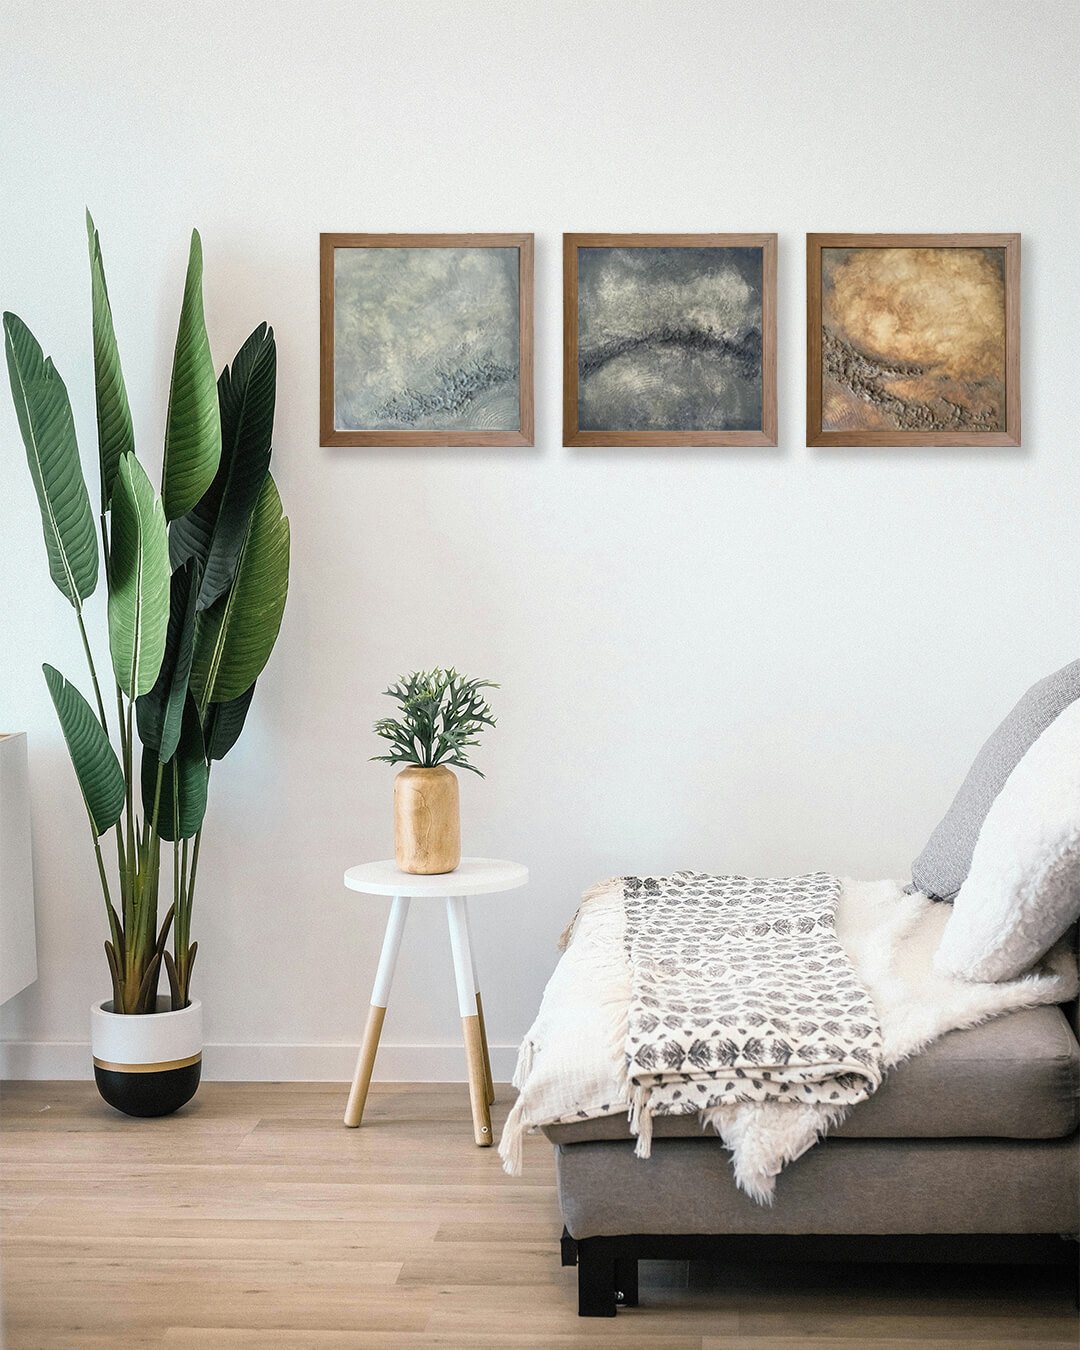
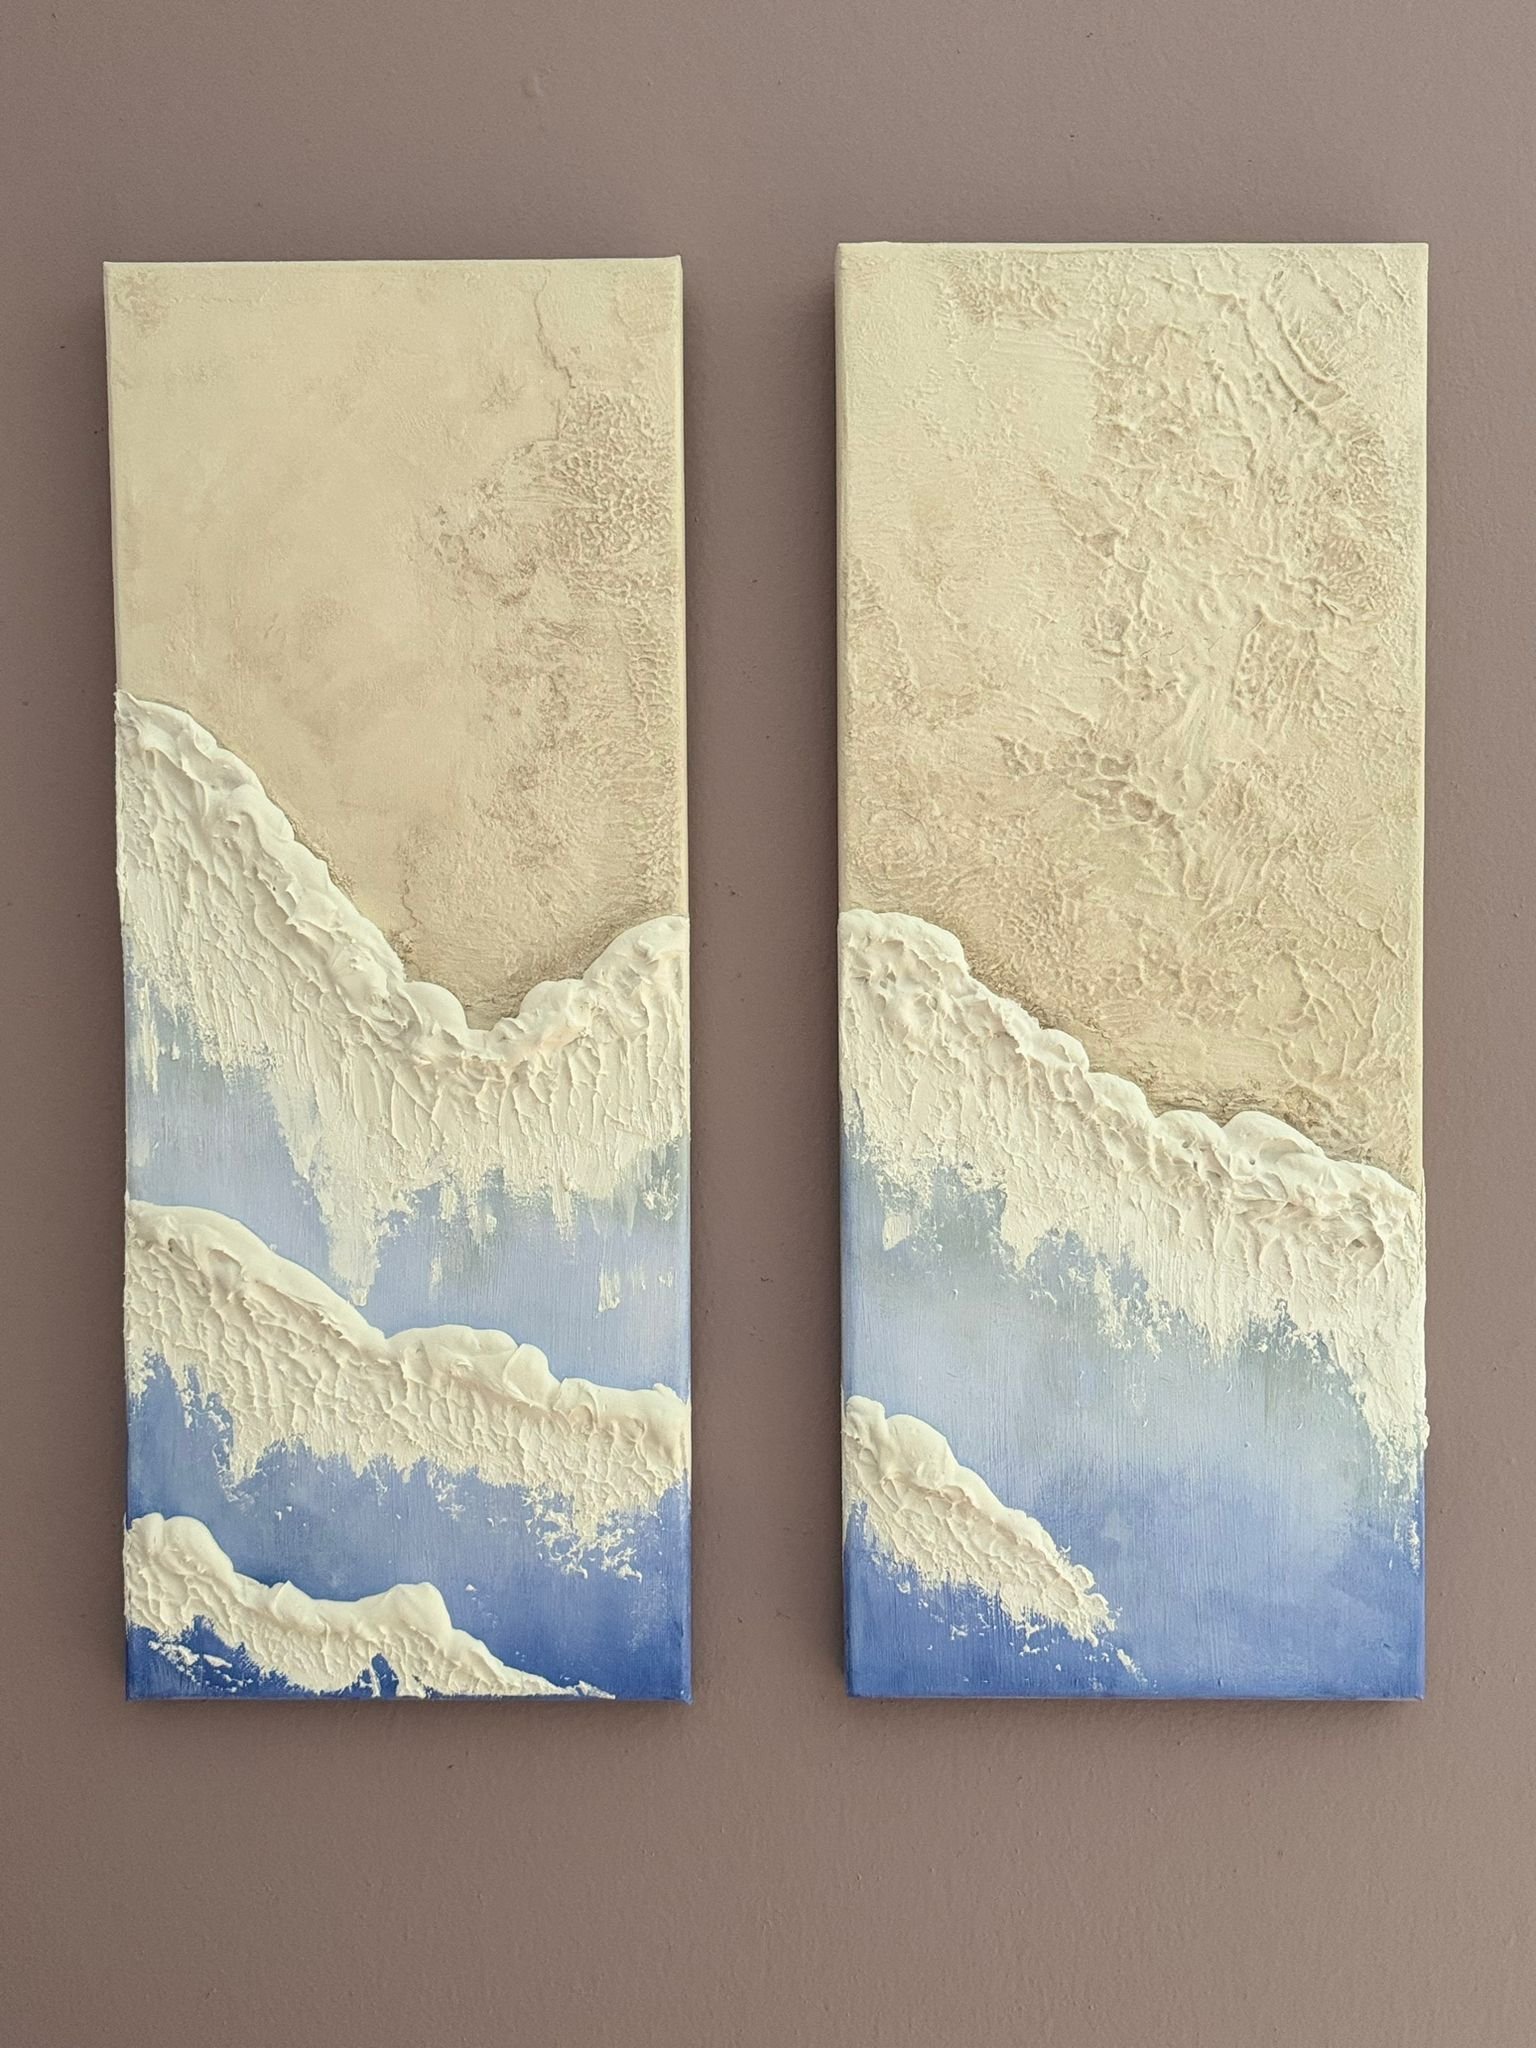
Idea 3: Wave Layers for Living Room Flow

Horizontal sweeps. Like sand dunes. Light beige all way.
Behind sofa. Balances bold cushions.
Dry brush light. Shadows play at dusk.
Idea 4: Leaf Imprints for Kitchen Herb Vibe

Press fresh leaves in wet compound. Ferns or eucalyptus. Neutral green tint if bold.
Over sink. Brings outside in.
Seal heavy. Humidity there.
Idea 5: Grid Texture for Office Focus

Square stamps with knife edge. Soft gray.
Defines workspace. Keeps mind steady.
Frame it float style. Shows edges.
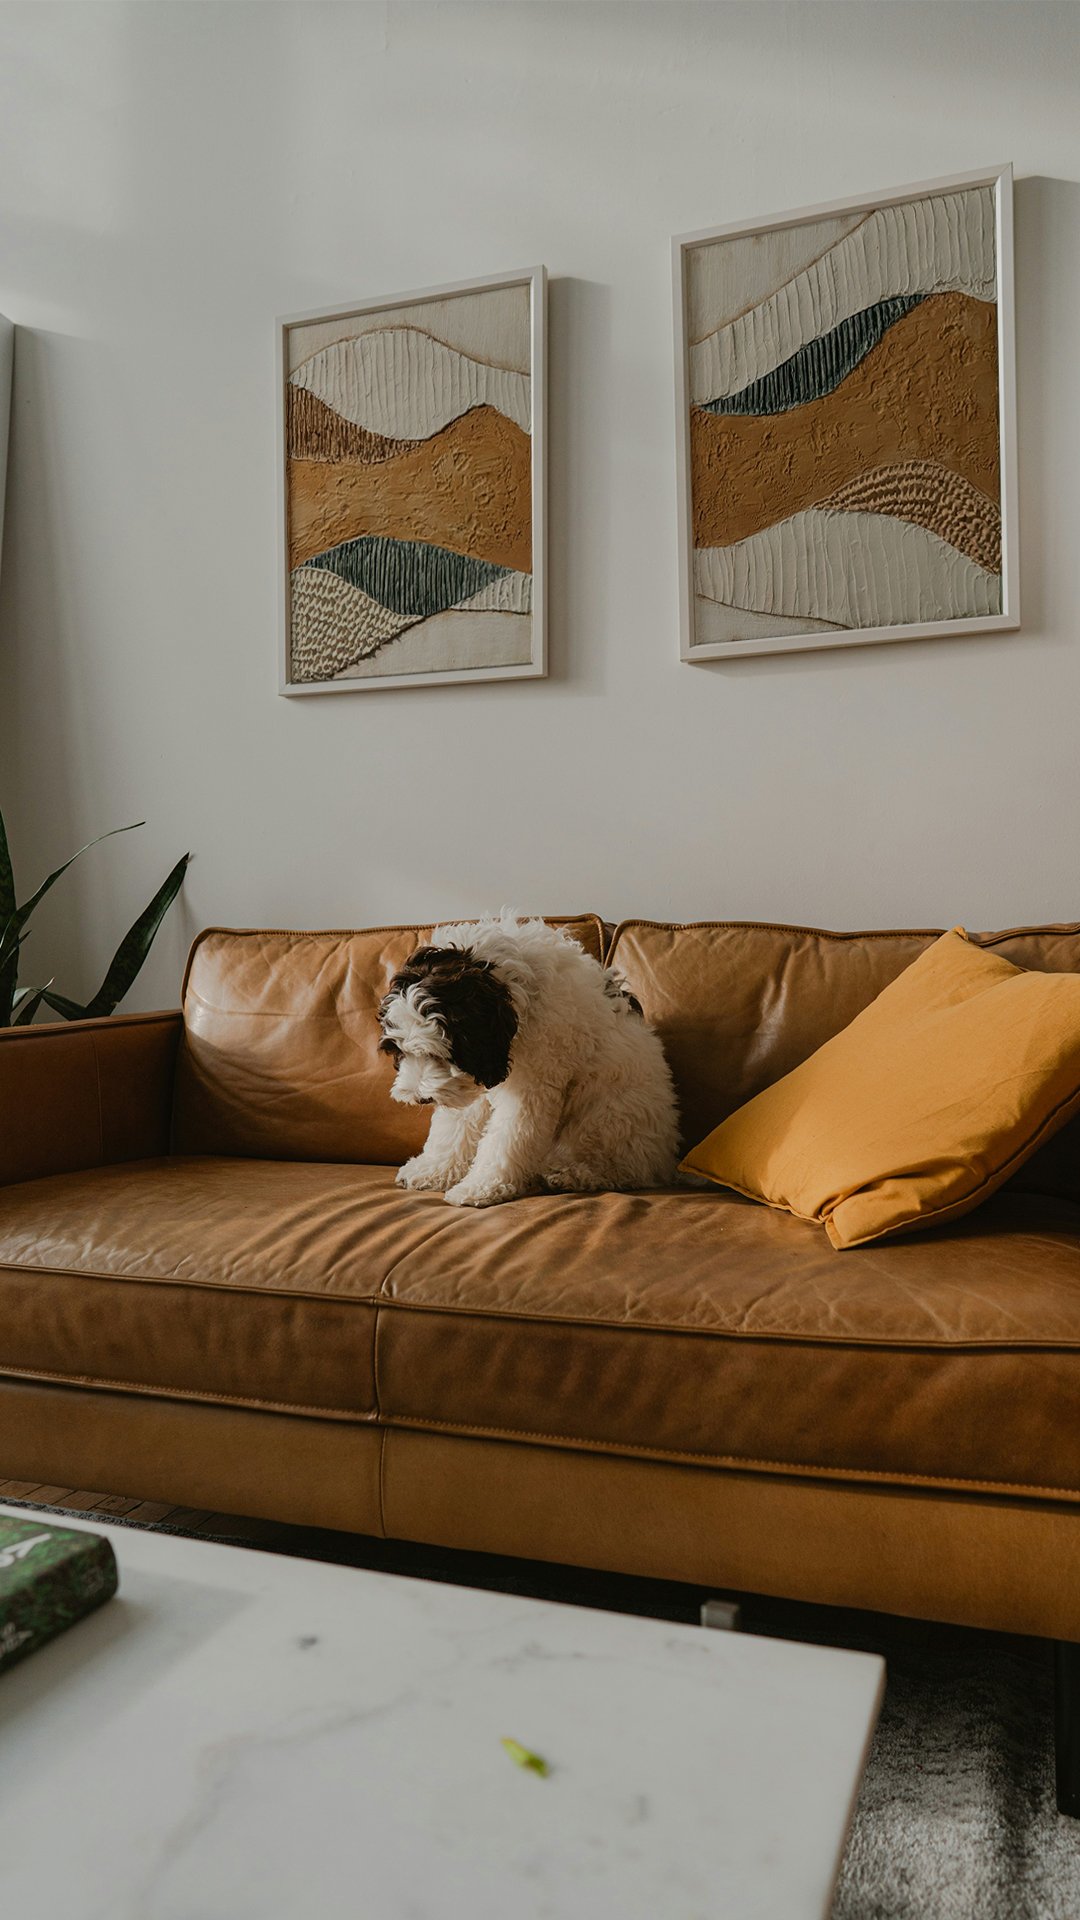
Idea 6: Abstract Hills for Dining Glow

Mound compound in rolls. Like far hills. Warm sand tone.
Candlelight hits ridges nice.
Group three. Vary sizes.
Idea 7: Minimal Lines for Hallway Stretch

Vertical drags. Thin lines. Pure white on white.
Elongates narrow spots.
Space them uneven. Feels hand done.
These ideas mix easy. Start small.
Tips for neutral colored wall art that feels organic and unique. Neutrals ground you. But plain bores. Texture fixes that.
Pick paints from nature. Shell pink, moss gray. Samples match swatches home.
Layer thin. One color peeks through. Adds age, like found driftwood.
Read: How to Make Textured Paint for Walls + DIY Textured Wall Art Techniques
Start base compound with mid-tone. Taupe. Dry brush lighter on top. Darker in crevices.
Test on scrap. Light changes everything.
Avoid stark white. Off-white warms.
One collection stresses beiges for versatility.
Living room: Over mantle. Draws chat.
Bedroom: Headboard side. Softens edges.
Kitchen: Between cabinets. Fills gaps.
Entry: Face door. Sets tone.
Group odds. Three or five. Vary heights.
Wire strong. Texture weighs.
Use command strips first. Test spot.
You did it. These pieces make your home yours. Unique, not store shelf.
If you’re looking to enhance your home decor, creating your own diy wall art canvas can be an exciting project. Textured canvas art adds depth and dimension to any room, making it a perfect choice for your living room or bedroom.
To begin your journey into diy wall art, gather materials such as a blank canvas, acrylic paint, and tools like brushes and tape. A simple design can become a stunning piece of art with the right techniques.
Texture can be created using various methods, including plaster, spray paint, or even collaging different materials. Consider how these textures will interact with the colors you choose to create a cohesive look.
When designing your canvas art, think about the overall vibe you want to achieve. A bold abstract design can serve as a focal point in your living space, while a minimalist approach may provide a sleek and stylish touch.
Creating art for your home doesn’t have to break the bank. With budget-friendly materials and a bit of creativity, you can craft stunning wall decor that reflects your personal style.
Seek inspiration from various sources, including online tutorials, art galleries, or even your furniture. The right color palette can transform a simple piece into a high-quality artwork.
Many beginners ask about the best way to seal their artwork. Using a durable sealant can protect your piece and enhance its longevity, ensuring it looks great on your wall for years to come.

Sign up to grab 10% off your first order and be the first to hear about new drops and exclusive deals!