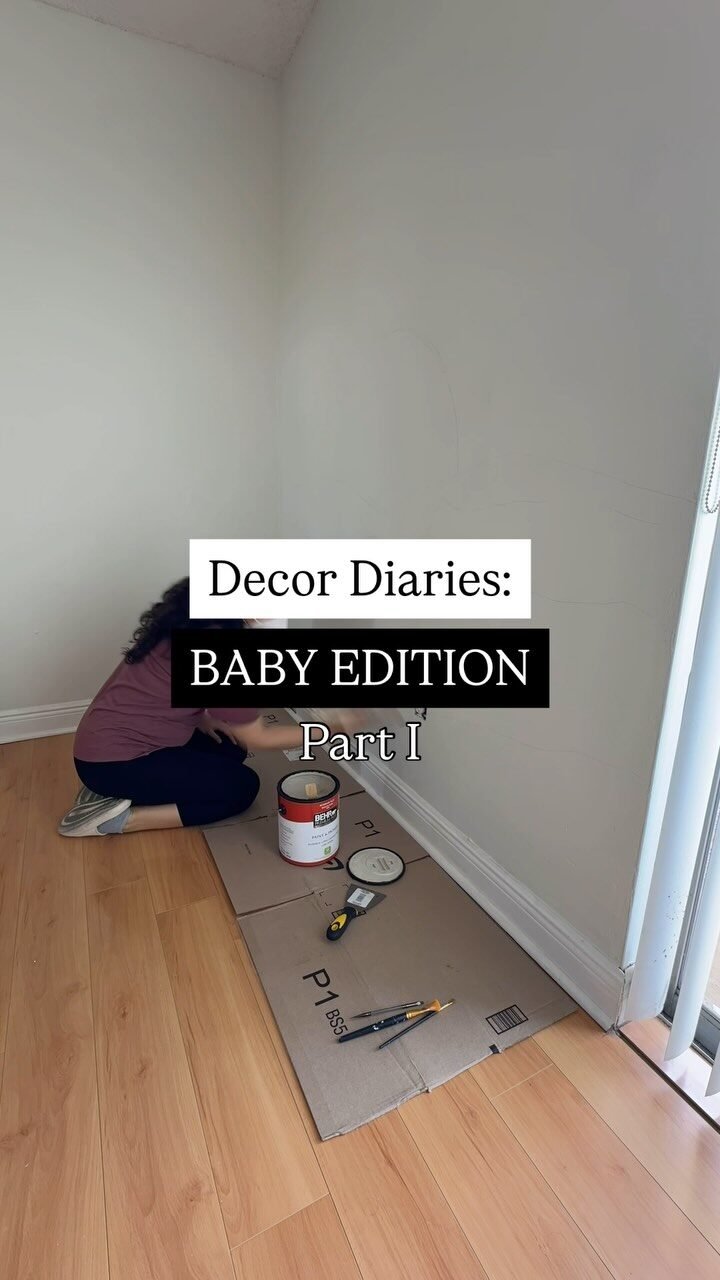
If you’re wondering how to paint with texture paint, so your artwork feels alive and dimensional, you’ve landed in the right place. Here I’ll walk through techniques that take a flat canvas into something you want to touch, not just look at.
Key Takeaways
Texture painting means creating raised surfaces, ridges, layers, or mixed media elements in your artwork so the eye and hand move across the work, instead of it just sitting flat. For someone like me (with an architecture/design background), I love how texture draws light, shadow, and invites the viewer in.
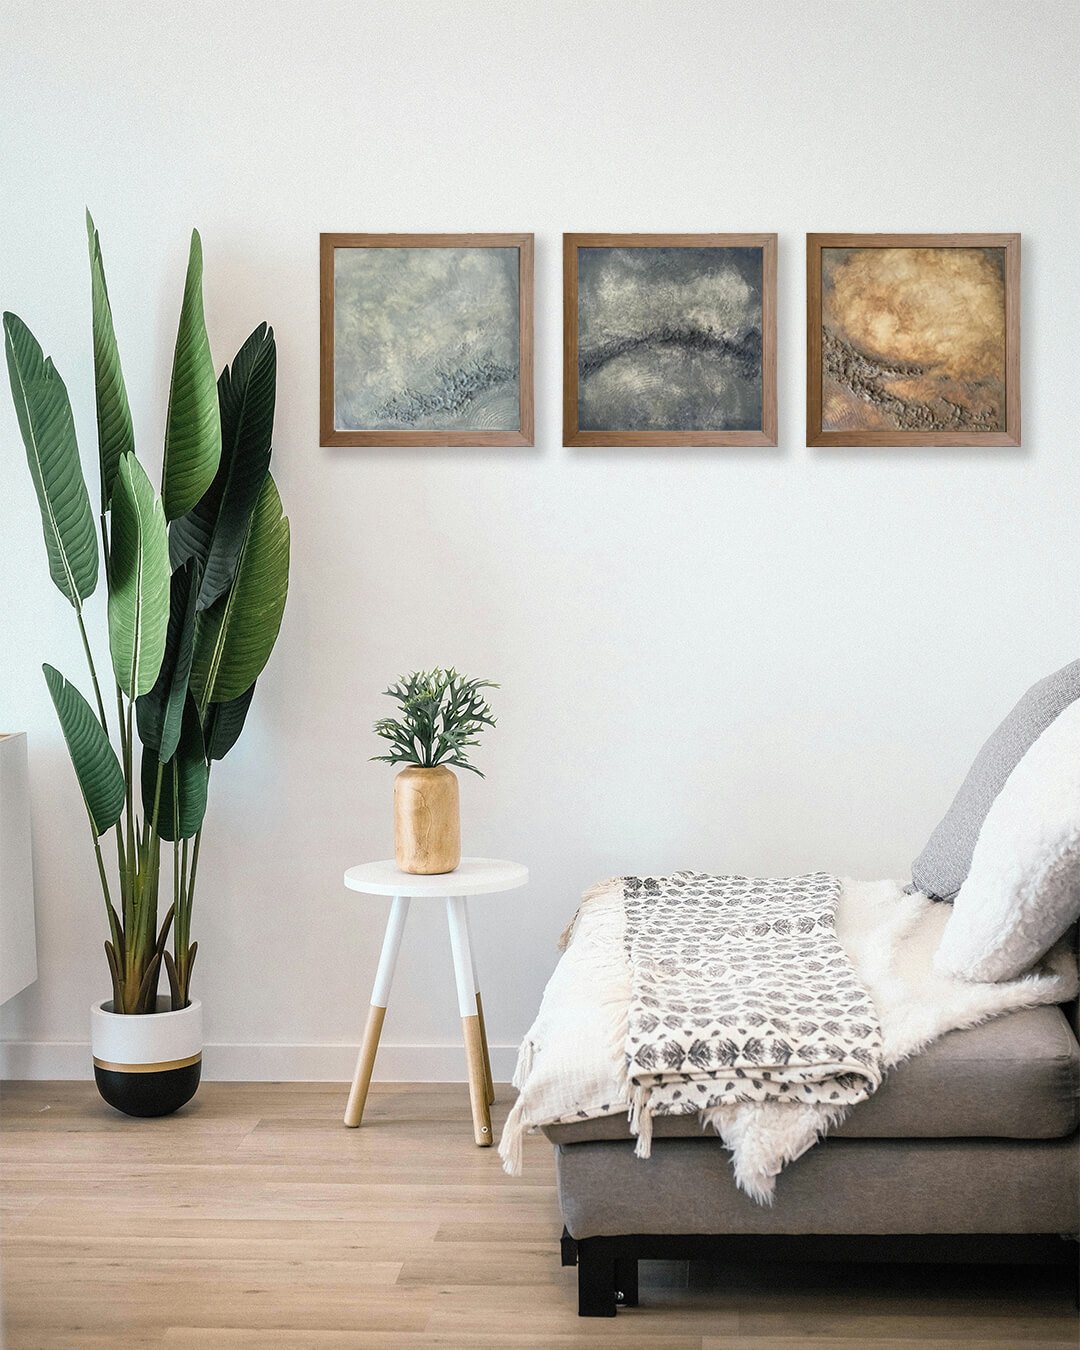
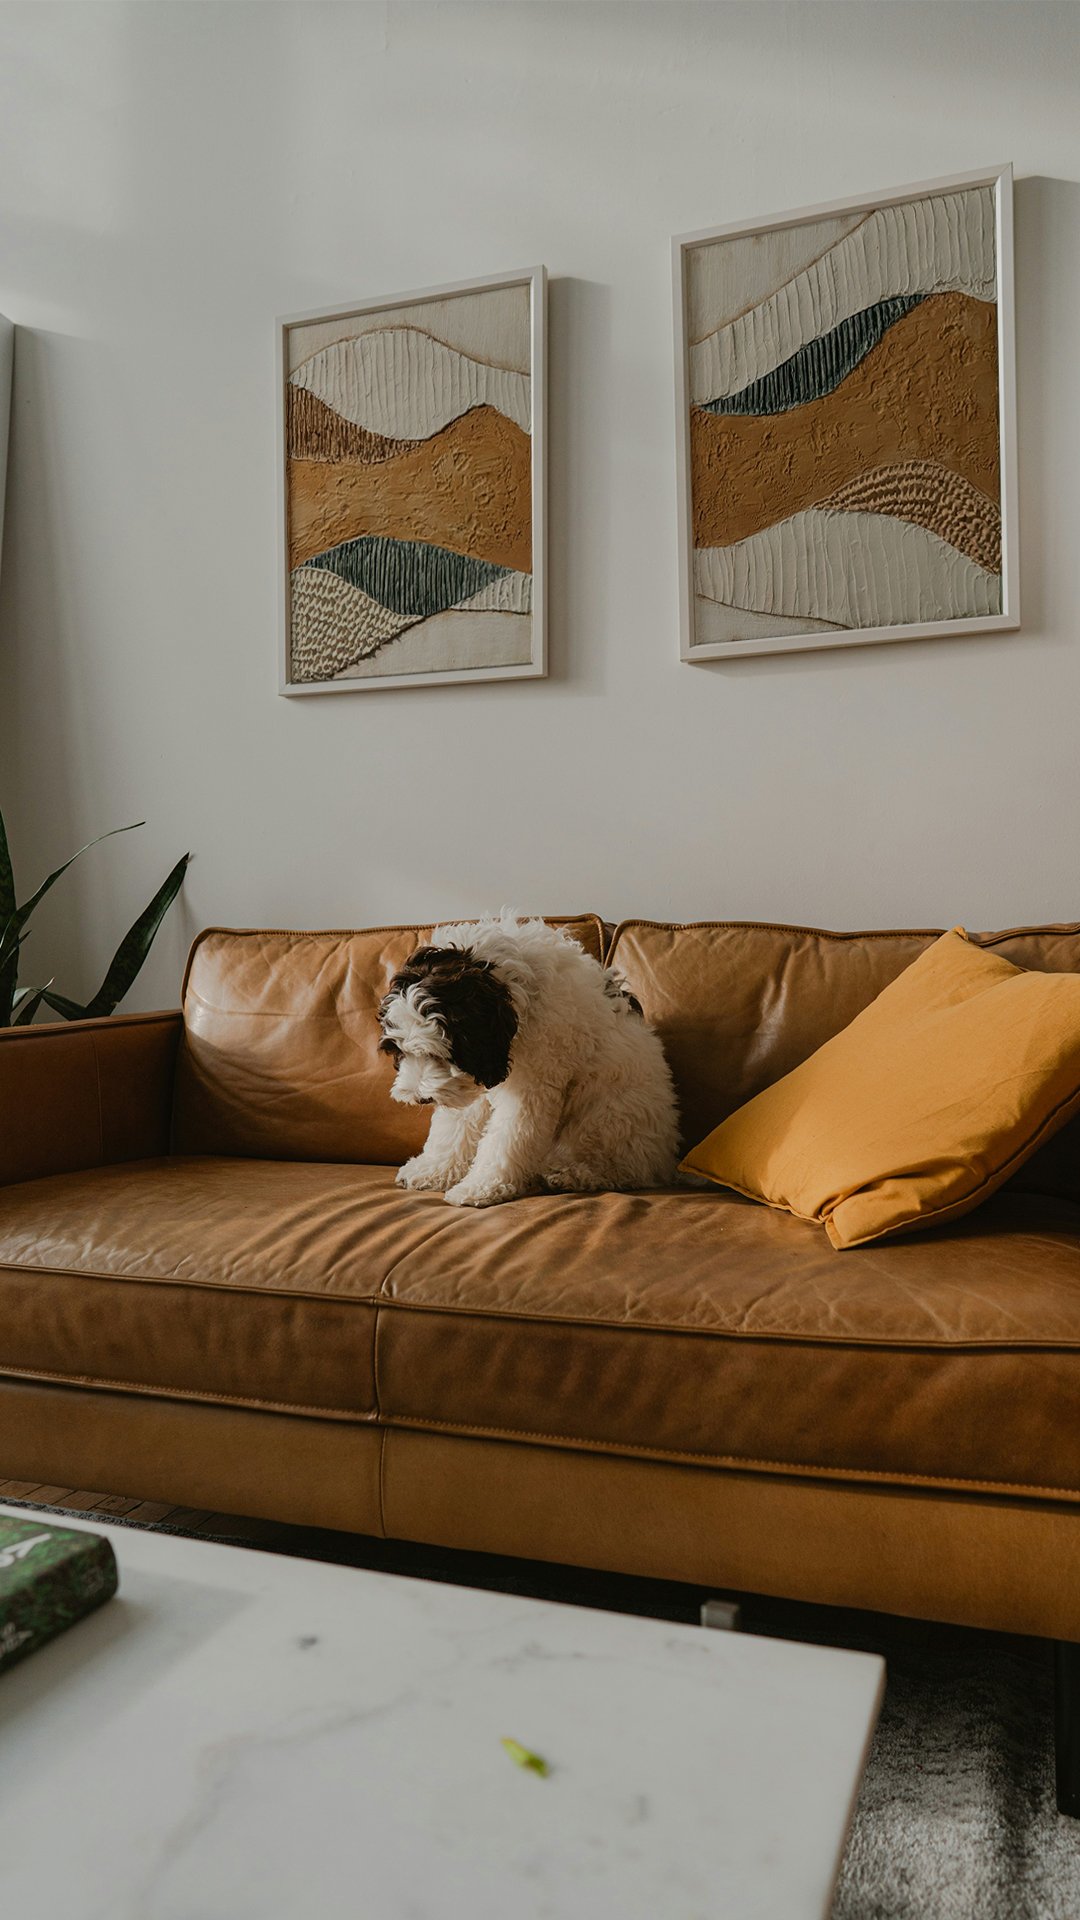
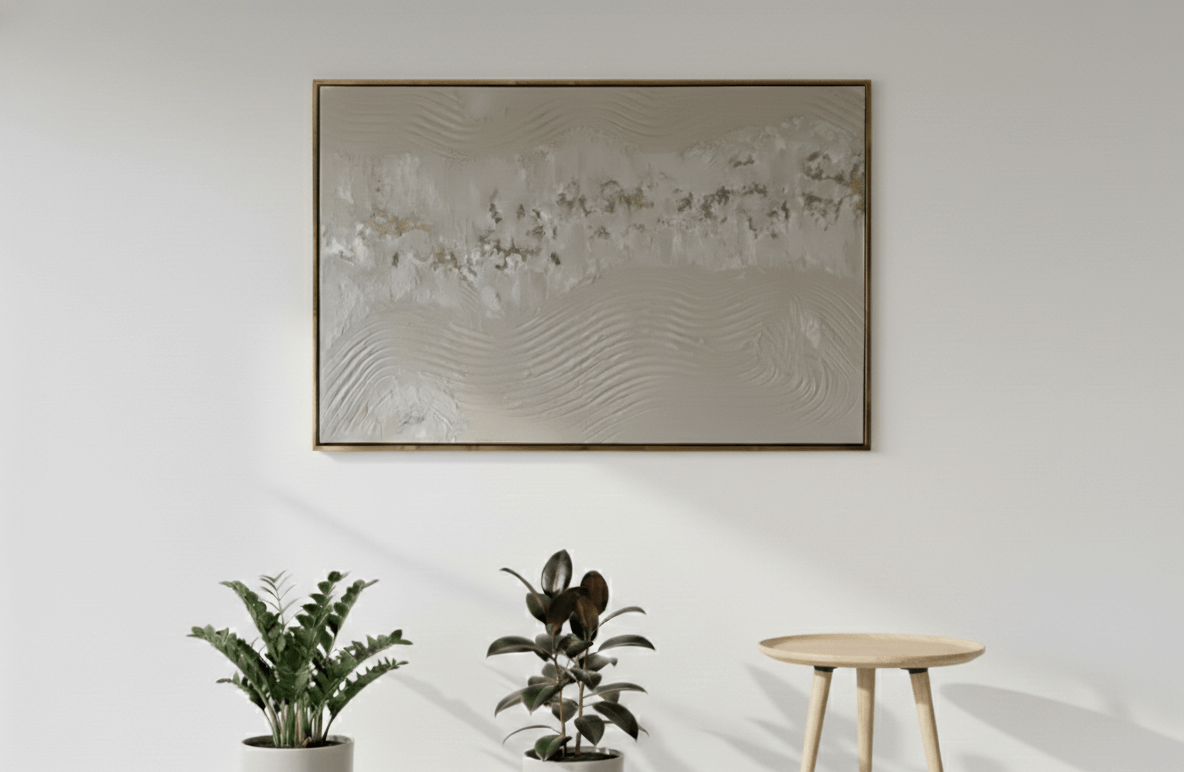
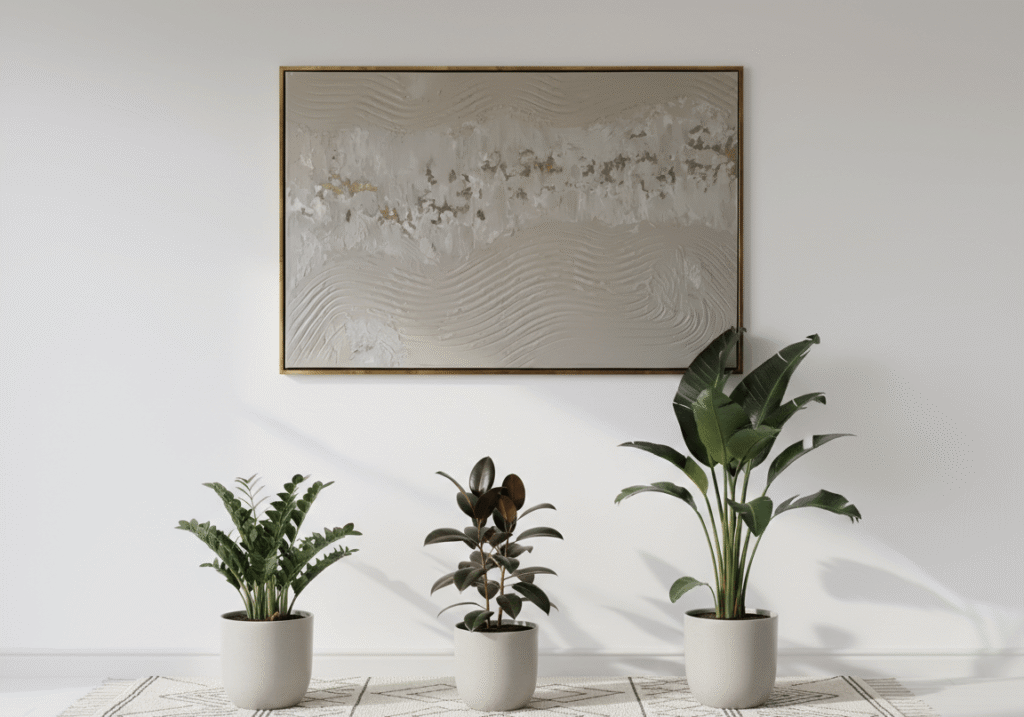
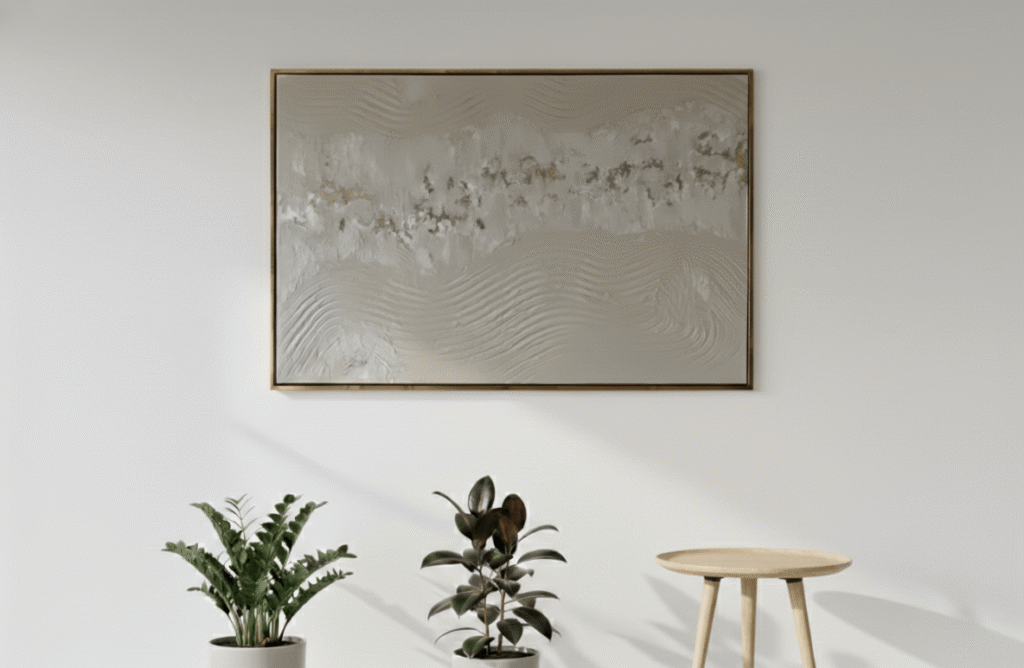
Why try it? In interior design, a ready‑made textured wall art piece becomes more than decoration-it becomes a tactile, physical element in space. It picks up neutral colors, soft materials, the feel of nature.
Learning how to paint textures gives your work a unique fingerprint. It’s a chance to combine color, movement, and material into something distinctly your own.
Once you know how to paint with texture paint, it’s easier to choose or create textured wall art that fits your home.
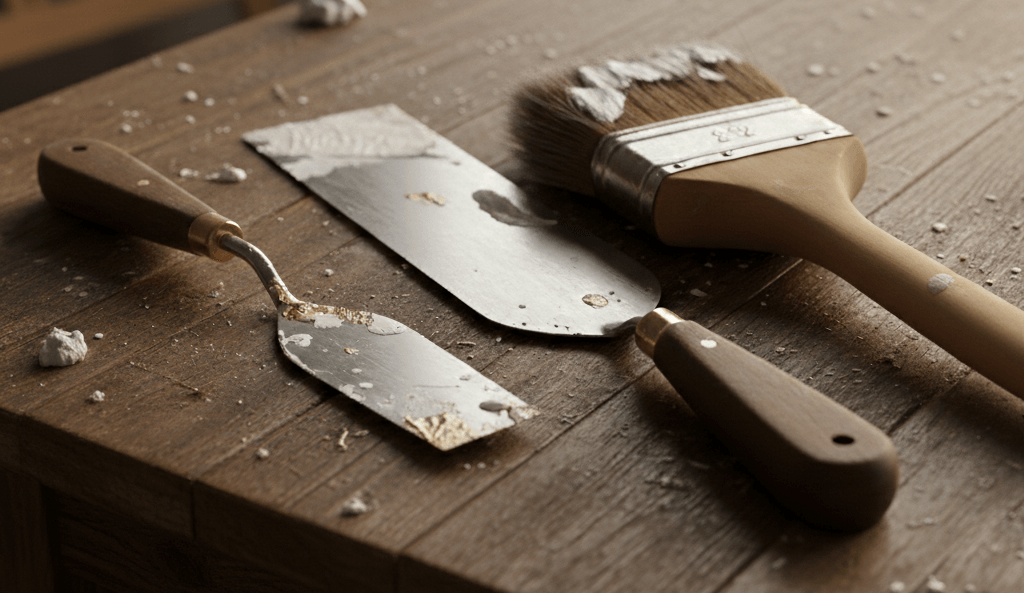
Before diving into texturing techniques, it helps to know your toolkit. Texture painting doesn’t demand expensive gear – just the right materials and a bit of experimentation. Here’s what you’ll want to assemble:
Paint Types

Texture Tools
Surfaces
Canvas is the classic choice, but you can also texture on wood panels, paper, or fabric – anything that can handle the weight of layered material.
Tip: Choose a neutral palette (greys, soft whites, warm beiges, muted greens) so the texture becomes the hero rather than bold color. Thin walls, calm surfaces, natural feel.
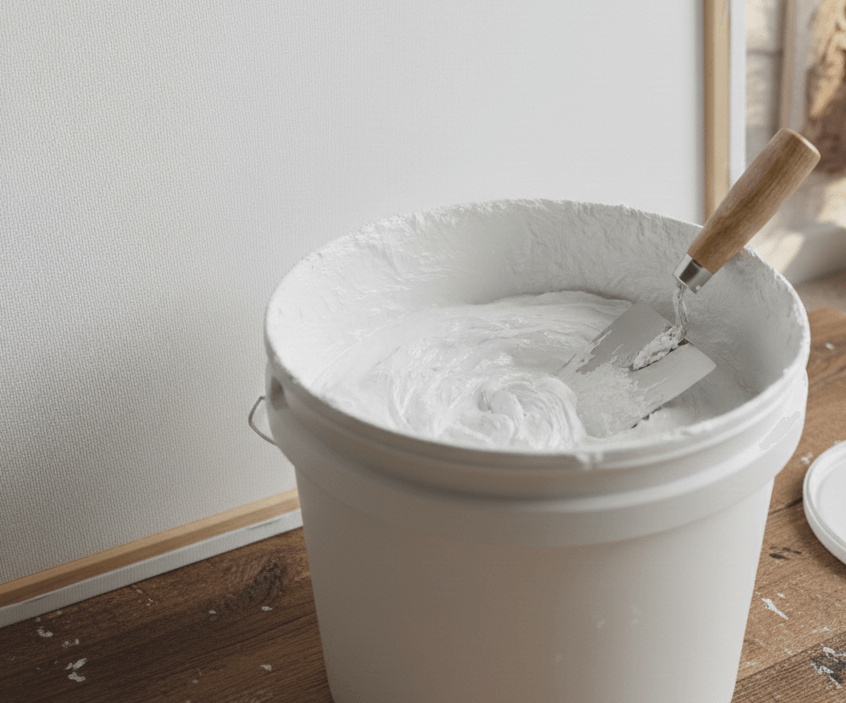
To understand how to create texture in art, it’s worth exploring the mediums that give your paint body. These are the secret ingredients behind most textured artworks.
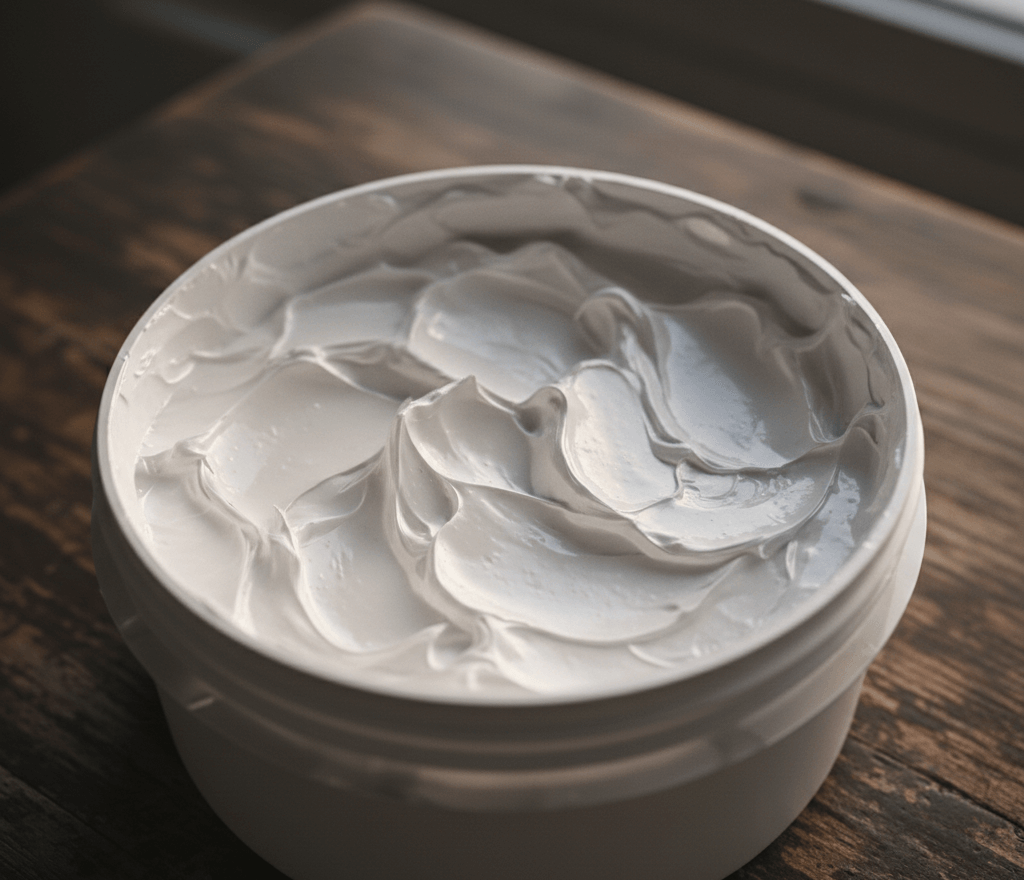
1 – Modeling Paste
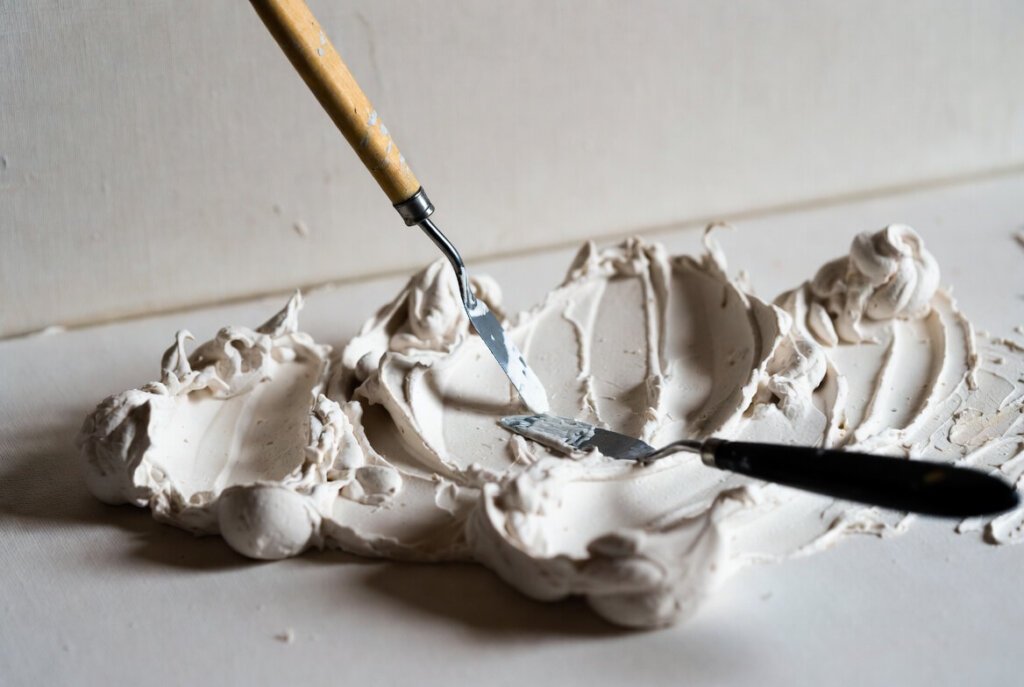
A thick, white paste that dries hard and can be sculpted or sanded. Perfect for heavy texture or relief work.
2 – Gel Mediums (Gloss, Matte, or Heavy)
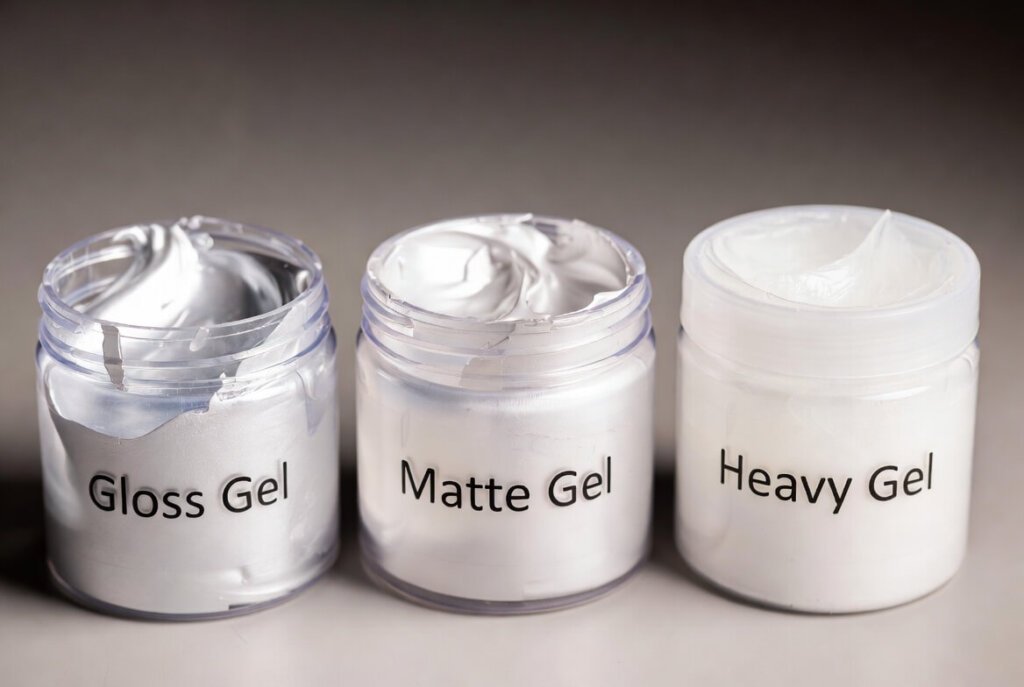
These change the viscosity of your paint. A heavy gel creates impasto-like peaks; a soft gel smooths transitions without losing depth.
3 – Sand or Grit Additives
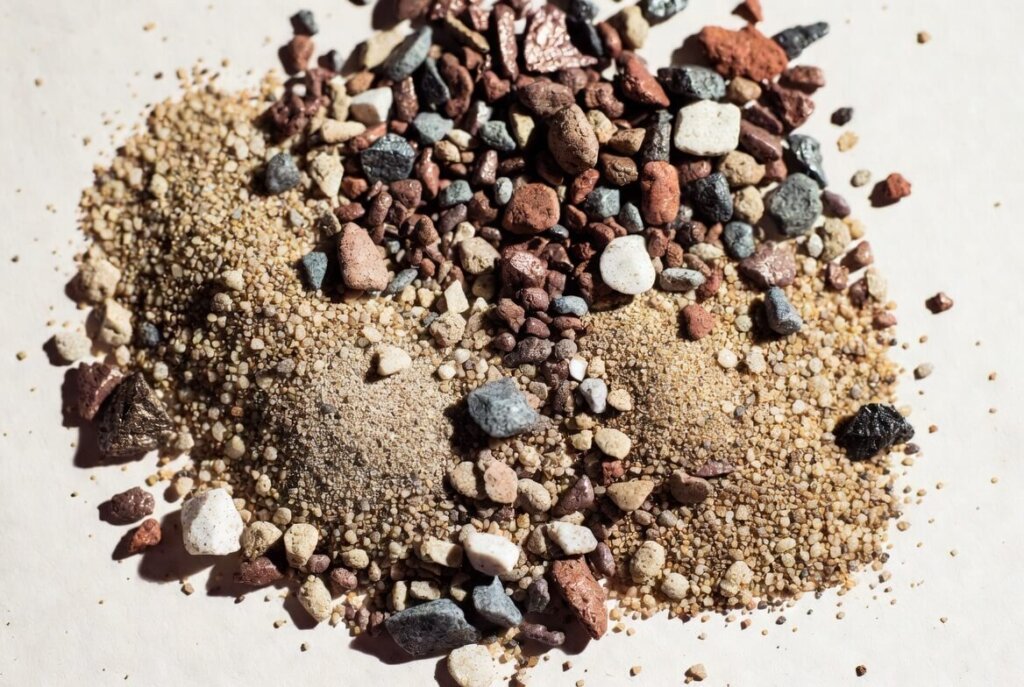
Mixed into acrylic or oil, they give your surface a rough, tactile finish. Ideal for landscapes, stone, or abstract texture.
4 – Fiber Paste
Adds a paper-like texture – great for mixed-media and collage-based textures.
5 – Natural Materials
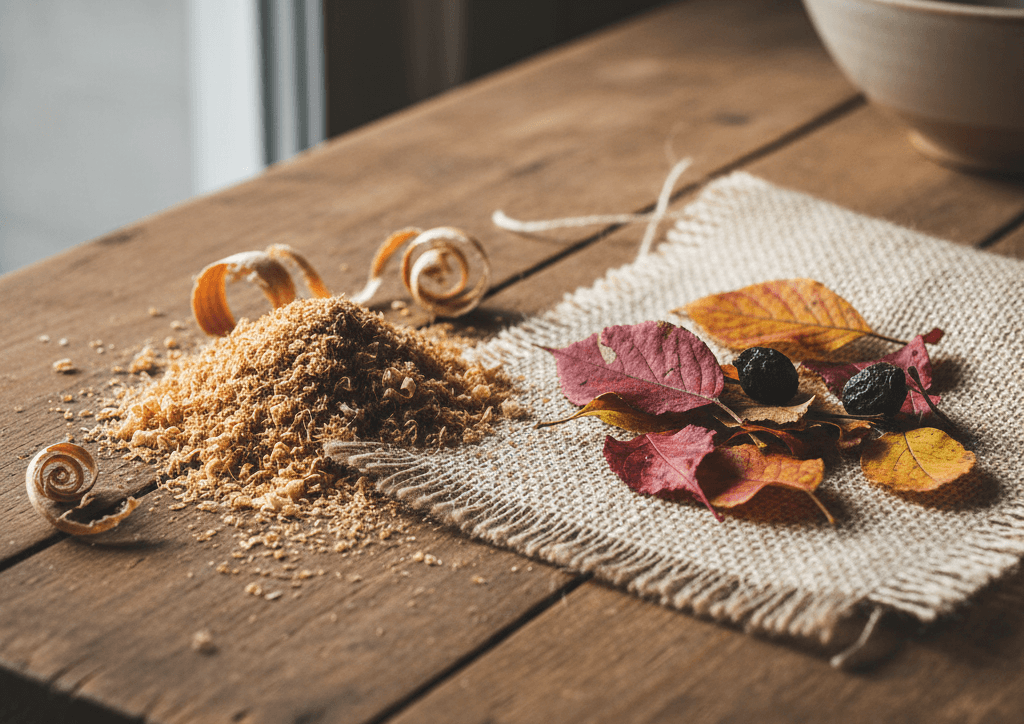
Some artists incorporate sawdust, fabric, or even dried leaves into the base layer. This not only adds texture but a narrative element to the piece.
Understanding these mediums allows you to approach texture painting not just as an effect, but as a form of construction – a layering process where every choice contributes to the final atmosphere.
Read: Texture Painting on Canvas for Beginners
Texture paint is a versatile medium that allows artists to add depth and dimension to their artwork. Therefore, in this guide, we will explore the use of cling film, masking tape, and textured tools in order to create a stunning textured finish on your canvas.
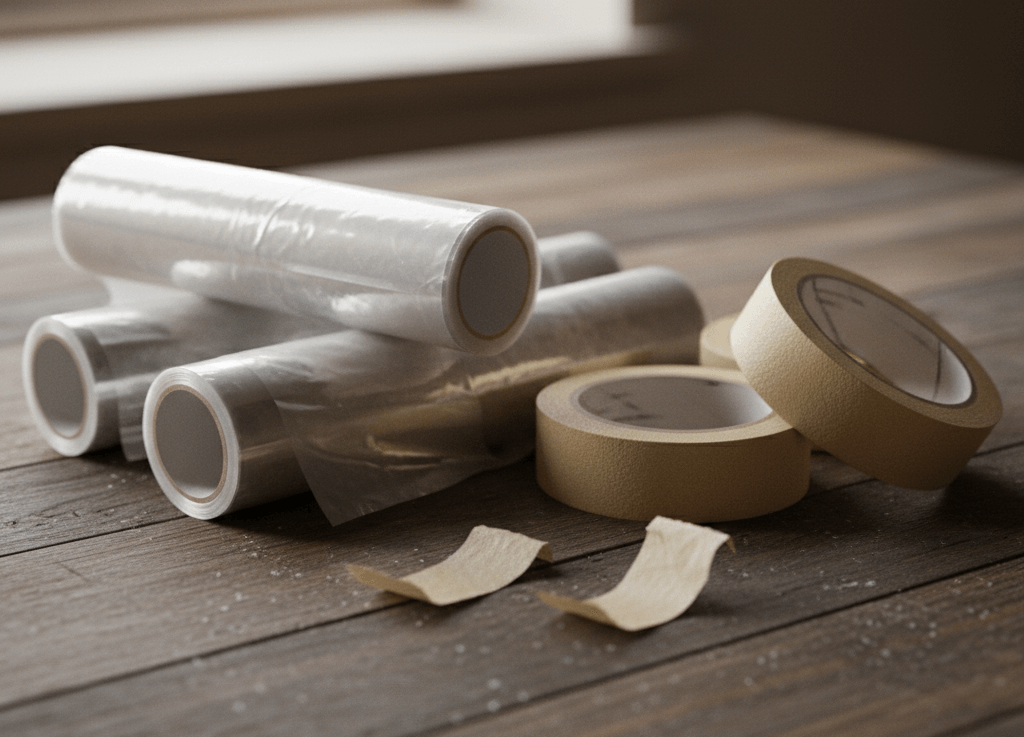
Cling film is a plastic wrap that can be used to manipulate paint effects. Meanwhile, masking tape is essential for creating clean lines and protecting areas of your canvas from unwanted texture. Together, these tools help control where the texture on the canvas is applied.
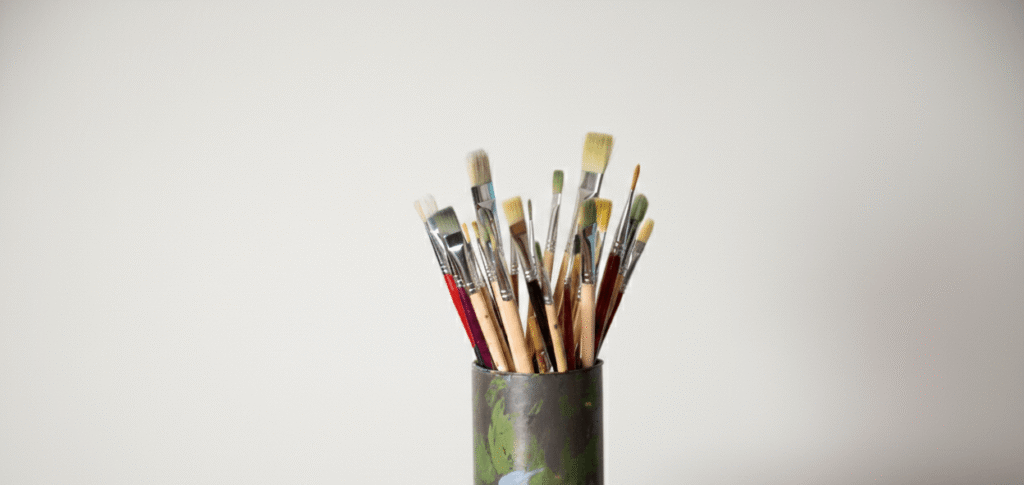
To create a textured surface, you can use a variety of tools such as a palette knife, putty knife, or even a paint brush. Each tool offers a different way to add texture to your artwork.
How to use everyday tools to create layered texture?
Experiment with different texture techniques, such as swirling the paint or applying a glaze over the textured areas. These creative ways to add texture will help you achieve the desired effect for your abstract wall art.
Process:
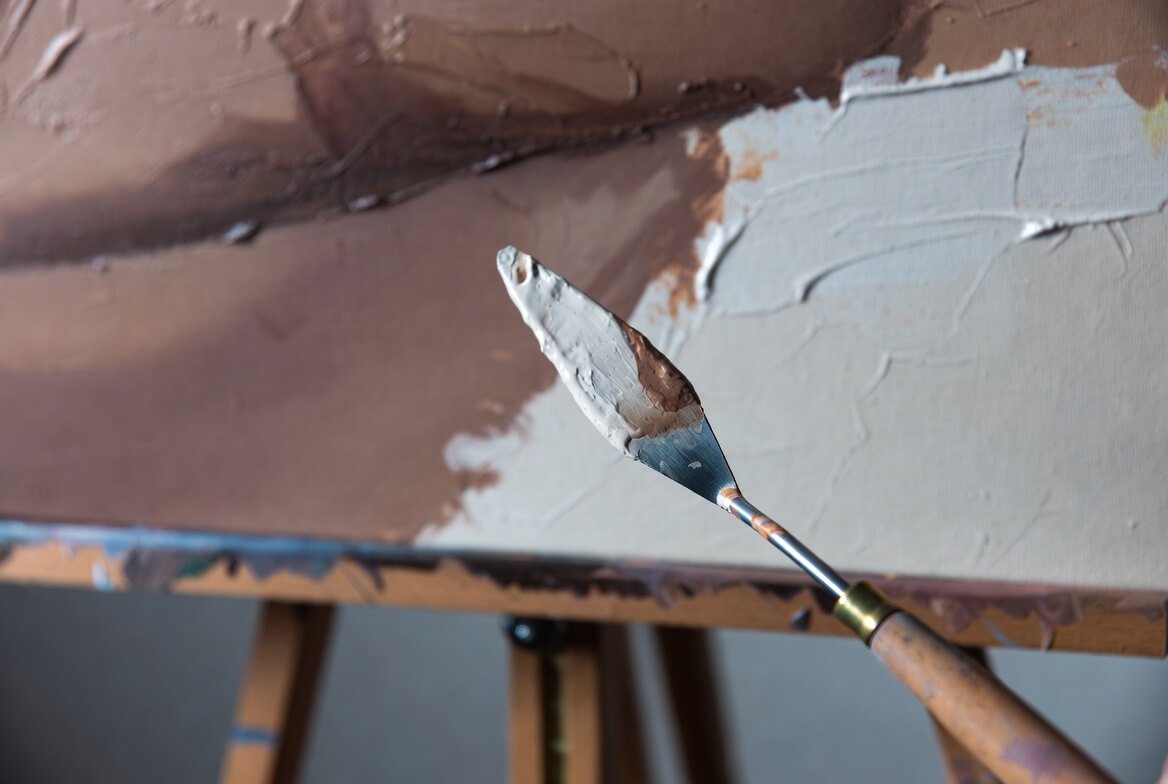
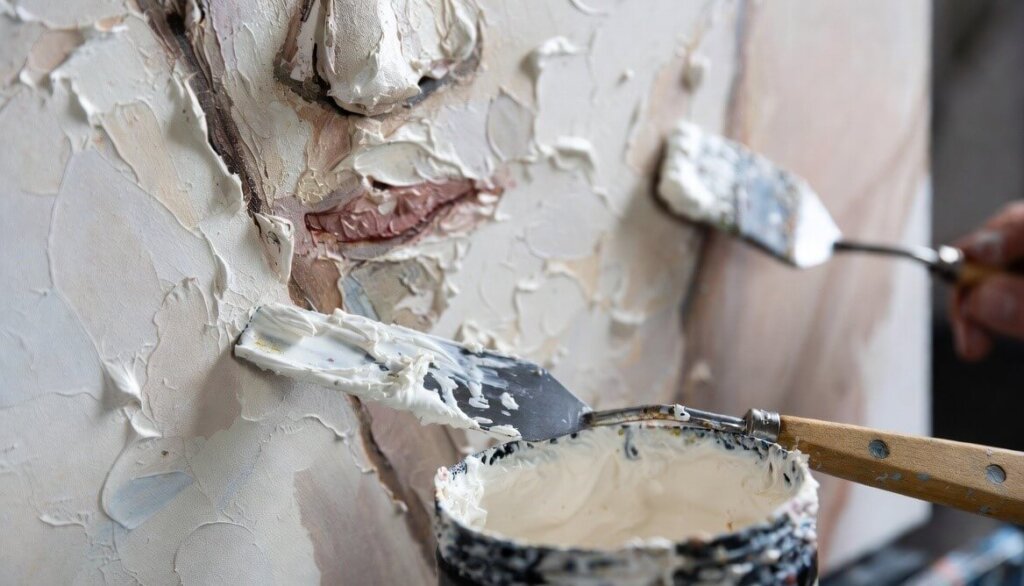
What does “impasto” mean, and how can you include it in your textured art? Impasto is a textured painting technique where paint is applied so thickly that the strokes are visible, and the surface stands out. How to use it:
Why it works for wall art: The texture catches light. In a softly lit room, the ridges create subtle shadows, which give the piece extra presence and depth.
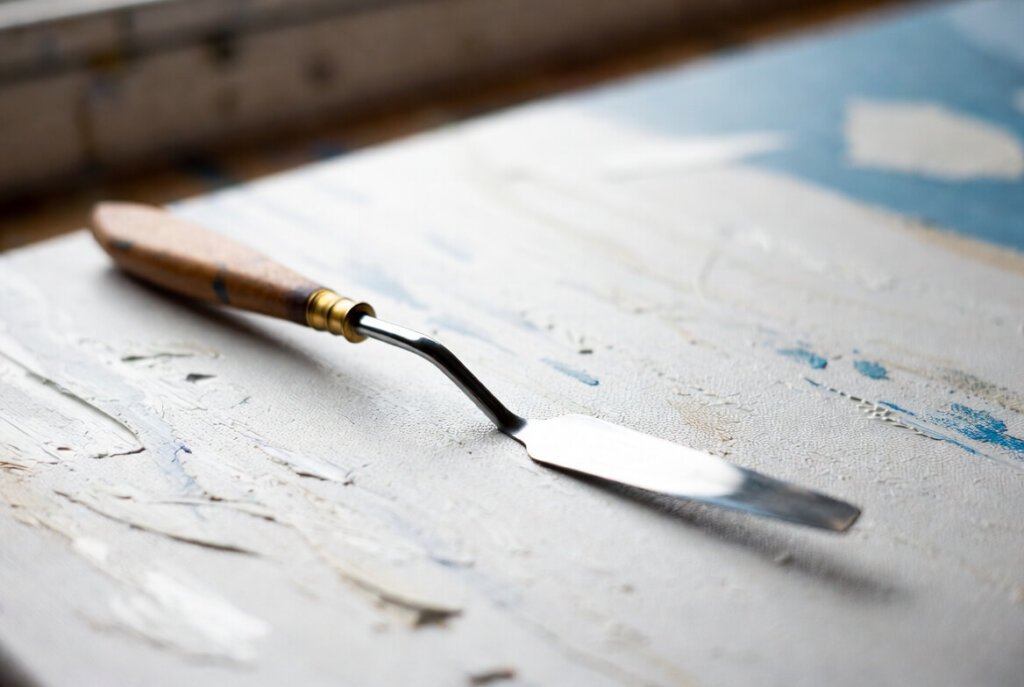
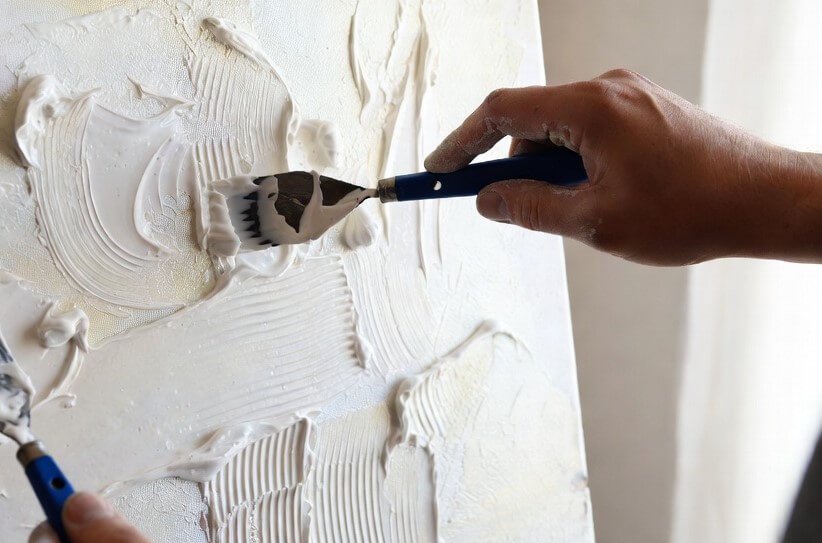
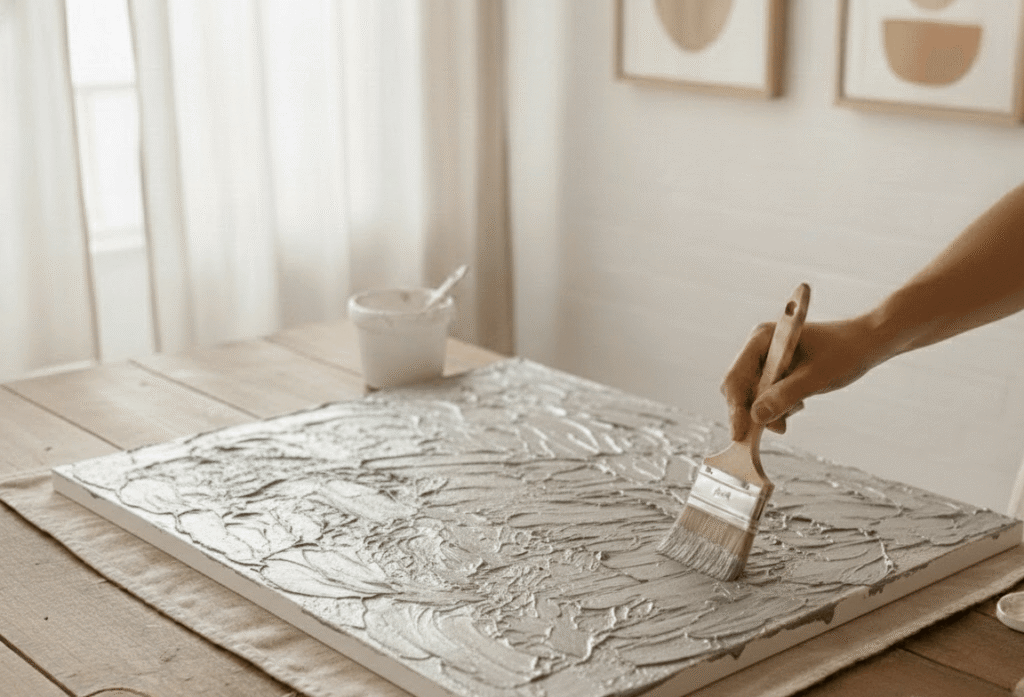
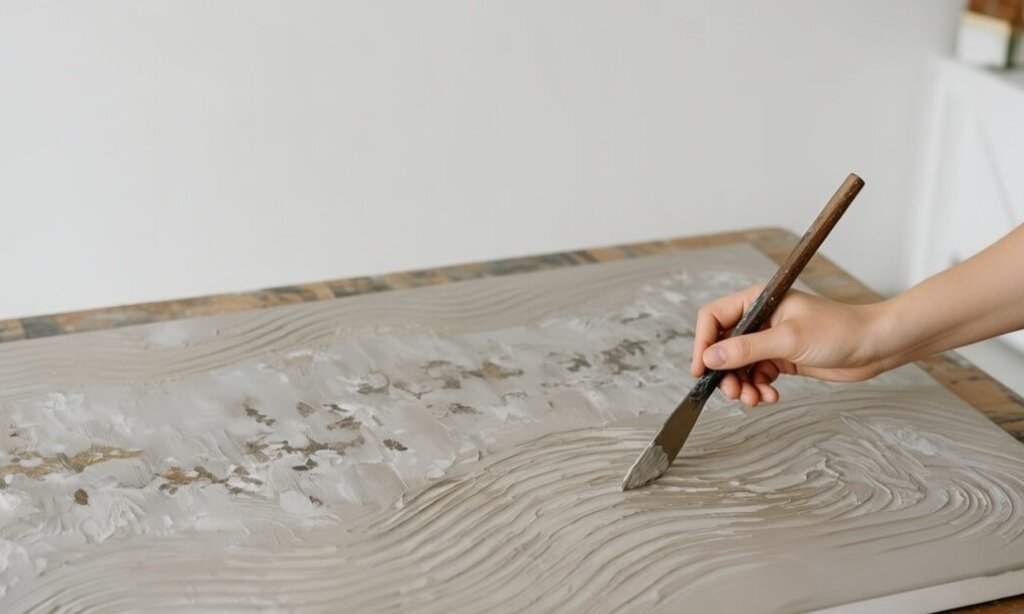
Why use a palette knife instead of a brush for texture painting? A palette knife gives you control over thickness, edge, scraping, layering. The flat tool lets you spread, scrape back, build peaks.
Steps:
Let layers dry, then add another layer and do the same.
In decor use: If you create a piece using palette knife texture, you’ll want to keep the color scheme simple, so the texture reads well in a living room or bedroom. A neutral canvas with textural strokes in off-white, sand, light gray works beautifully.
What are dry brushing and underpainting, and how do they help texture painting?
Underpainting: painting a base layer (often in a contrasting color) to set value and mood. Example: burnt sienna under cool blues/greens gives vibration.
Dry brushing: using a brush with very little paint (and often a stiff brush) to lightly drag across surface, so brush ridges catch the high points. Example described in Mont Marte blog.
How to do it:
Use this for subtle texture effects: rough tree bark, wispy grass, or fabric-like surfaces.
Interior-design angle: This technique works great for pieces that sit above a sofa or fireplace where you don’t want heavy peaks but still want tactility. The texture is gentle and the surface catches light softly.
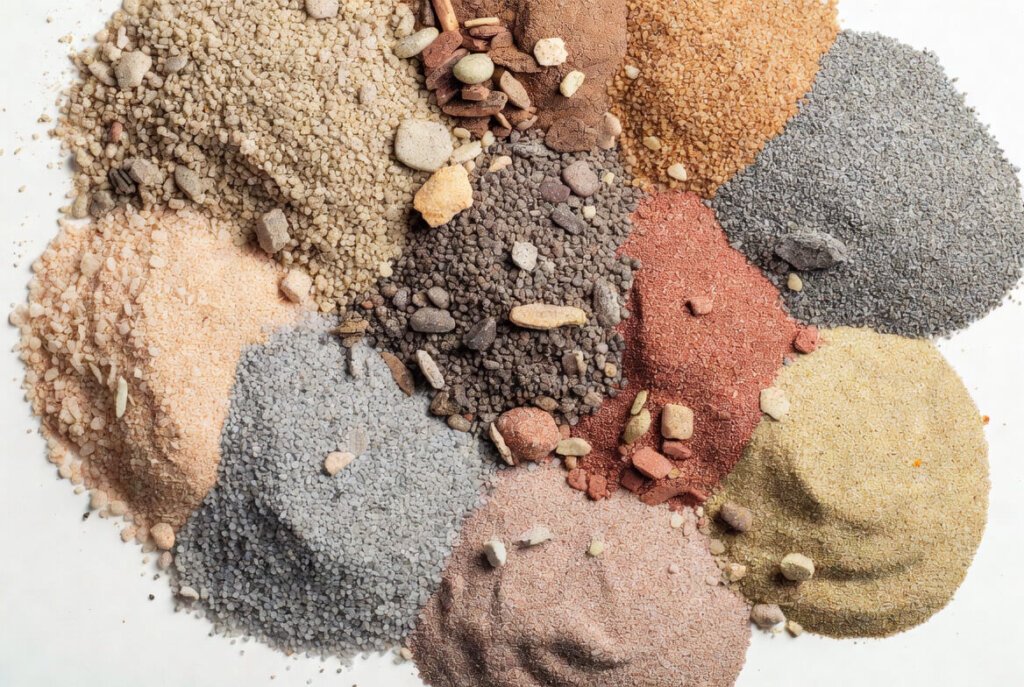
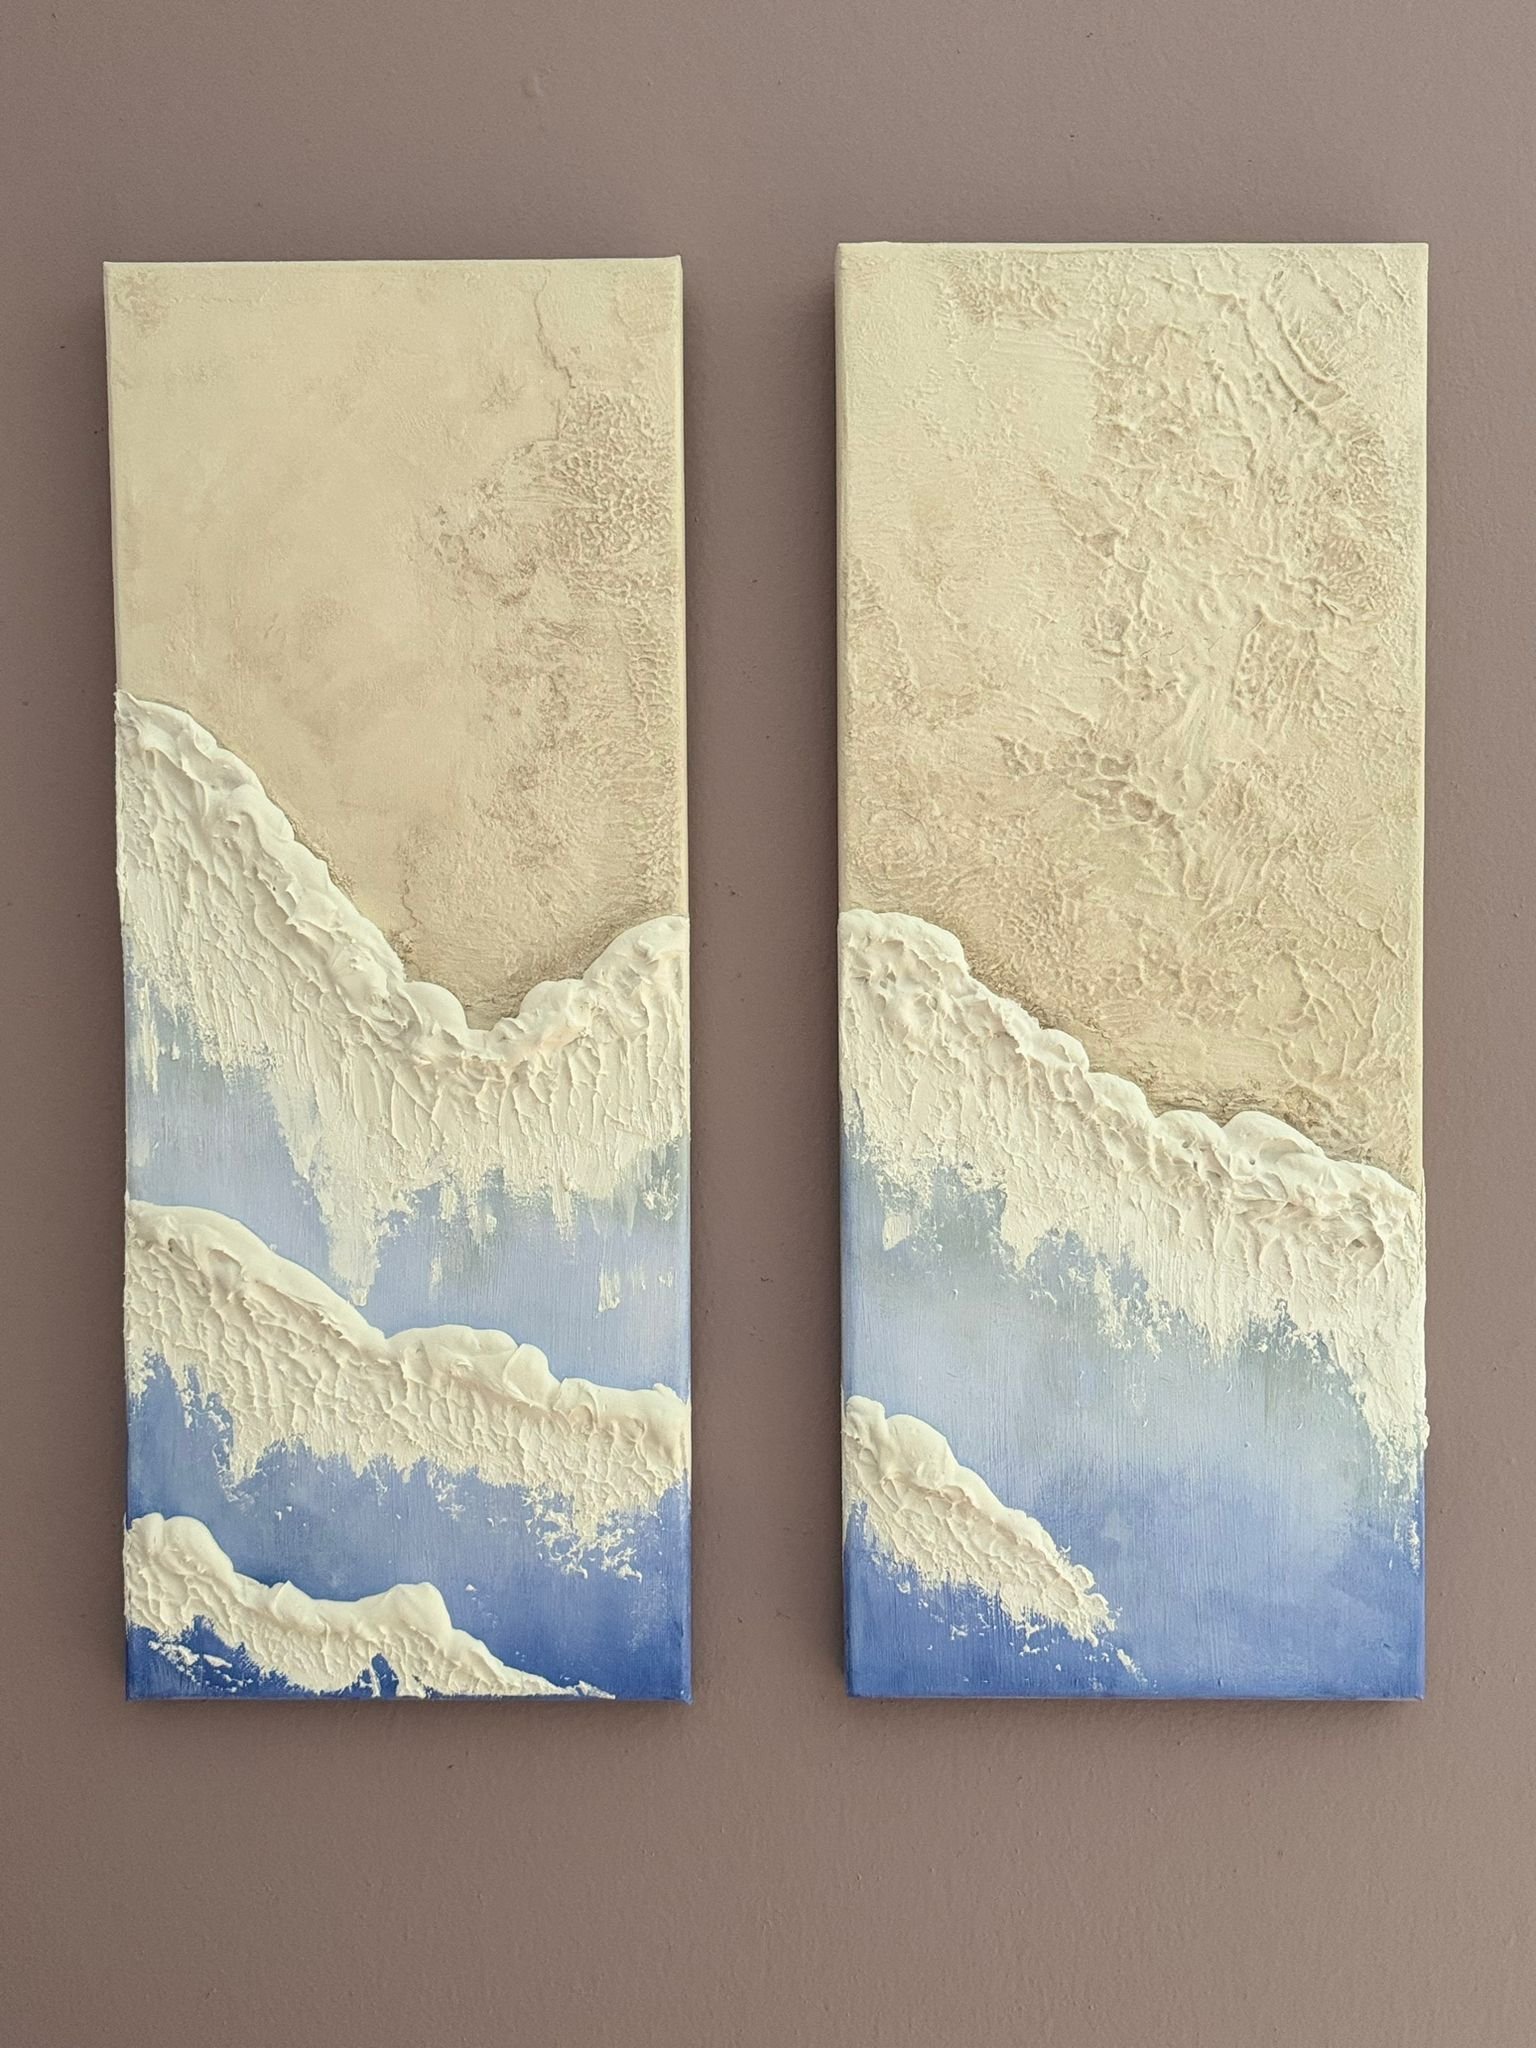
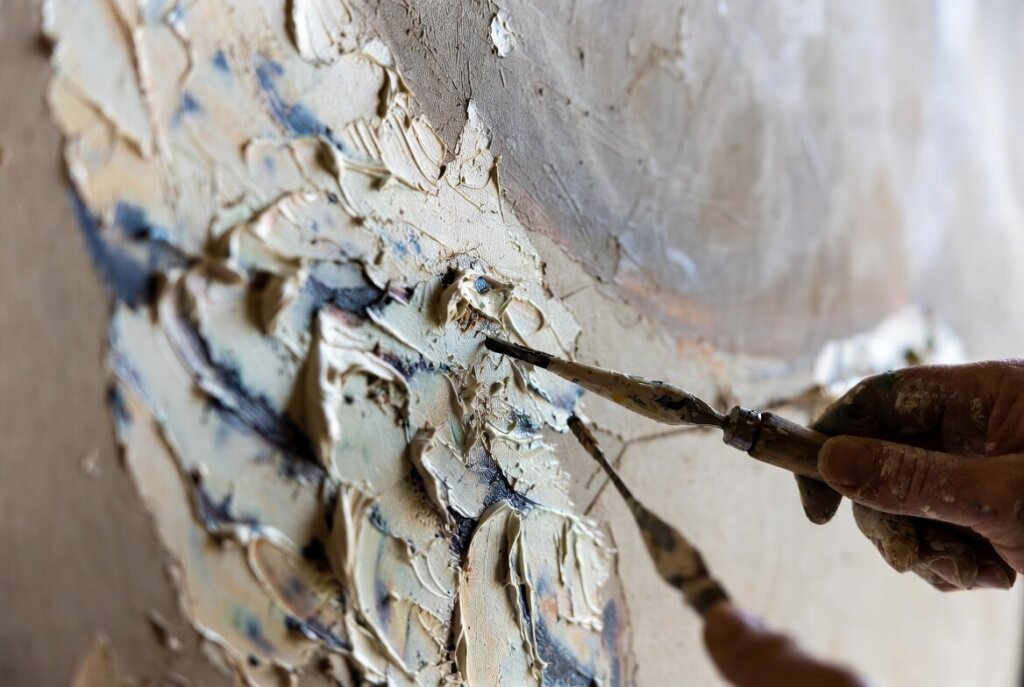
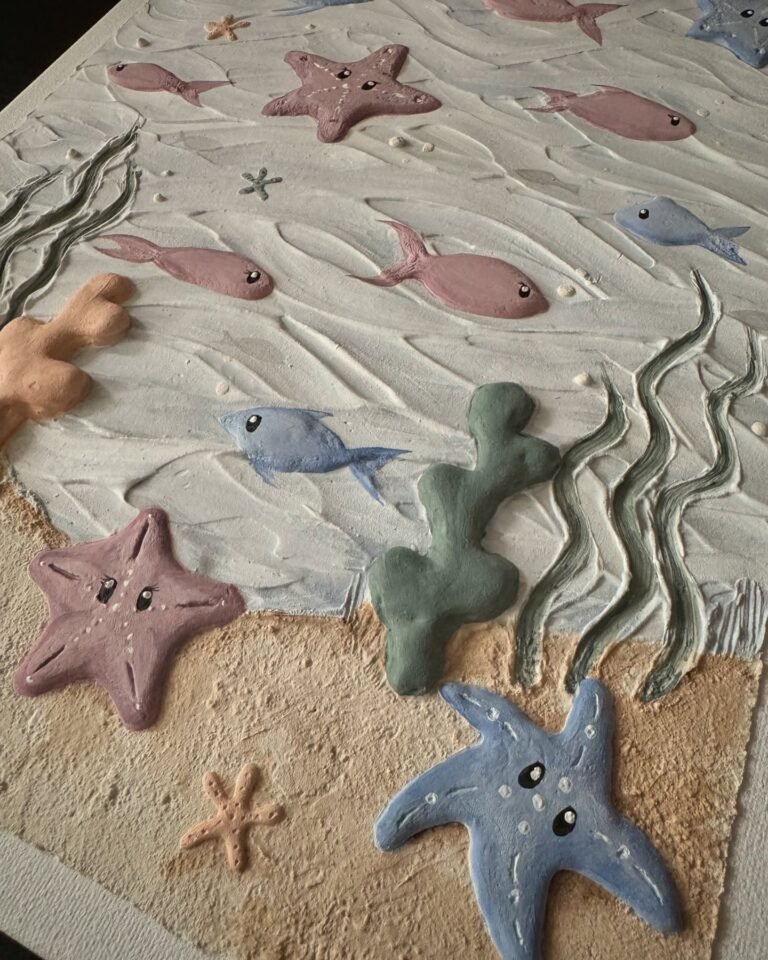
Can you use non-traditional materials to build texture in painting? Yes. Adding sand, fabric, paper, string, found objects gives a surface that invites touch and visual interest. For example, you can sprinkle sand into your paint or use fabric pieces under a layer of paint.
How to apply:
Think of nature-inspired textures: driftwood fragments, rope, leaves embedded in modelling paste.
A nature canvas wall art can be a perfect choice if you love nature-inspired pieces.
How to do it:
Interior use: Works well when you want the textured art piece to carry both surface presence and depth without being heavy. A scraped textured layer in a soft gray-white piece can add complexity while staying calm and minimal.
How do you take these studio techniques and apply them to wall canvas art pieces that live in a home setting?
Here’s a process you can follow (or share with a frind or family). You don’t need to do all techniques – pick two or three and create a cohesive piece.
Let’s put it all together. You’ll need:
Step 1: Plan your piece
Use a heavy canvas or wood panel. Prime with gesso if needed. (Good surface gives better texture response.)
Step 2: Prepare your surface
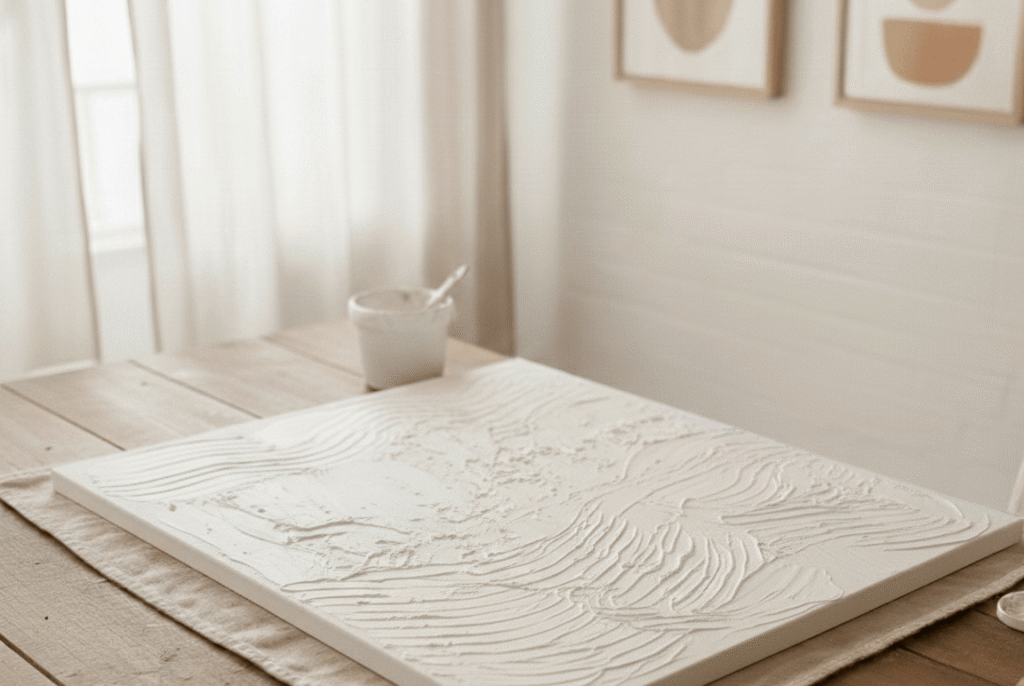
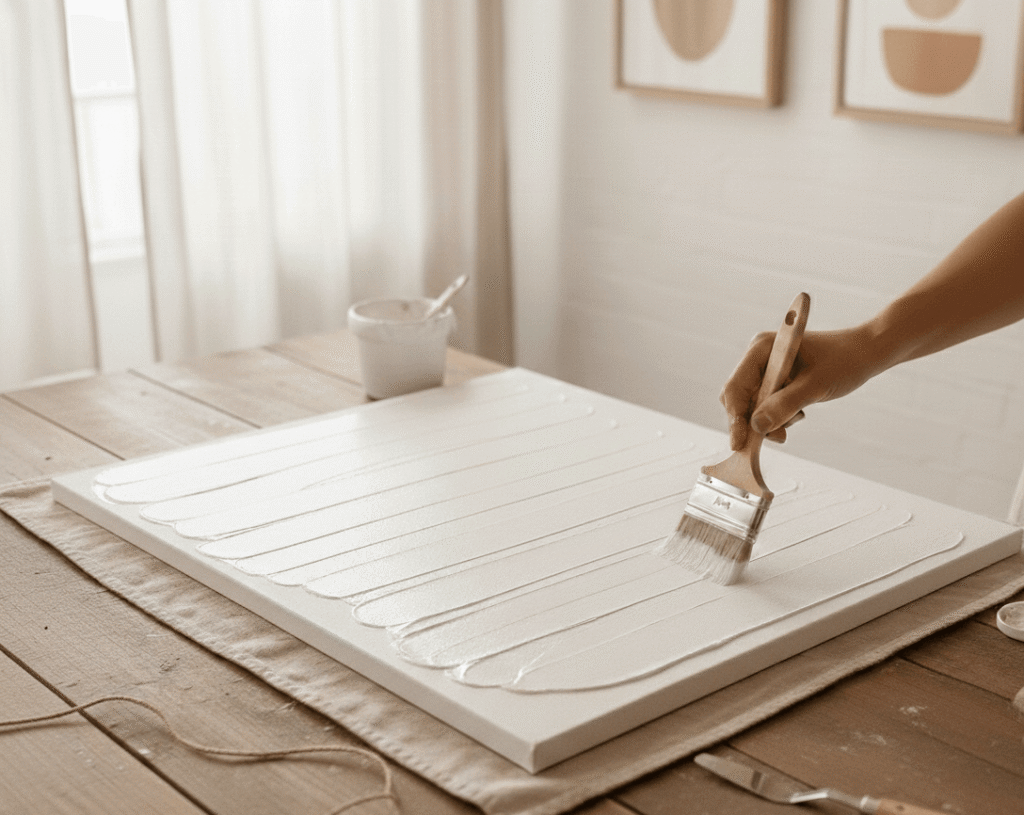
Sketch lightly. Think of nature elements you love – e.g., branch silhouettes, leaves, soft waves of sand. Then decide which areas will have heavier texture and which will be smoother. Apply a thin layer of modeling paste using a palette knife. Create peaks, ridges, or sweeping movements. Let it dry partially.
Step 3: Add your base color
Once the surface is tacky, brush on your primary color. The paint will cling to the ridges differently, revealing texture naturally.
Step 4: Build structure with modelling paste or gel medium
Mix in sand or coarse beads for texture in “earth” zones (Technique: adding dry mediums).
Add secondary colors or glazes over dry sections to highlight raised areas. Mix in gel medium for thicker passages.
Step 5: Enhance details
Once paste sets somewhat, apply additional paint layers. Use palette knife to apply further colour, scrape back some areas (Sgraffito), dry brush highlight edges (Dry Brush).
Step 6: Apply main colour layer
Step 7: Add secondary texture
Step 8: Let it settle & refine
Step 9: Seal (optional if the work needed) and finish
Step 10: Fine-tune lighting/relief
Use angled light when photographing. You might emphasize peaks with a metallic glaze or light highlight to catch the eye (Light + texture interplay).
Step 11: Hang and light it with your decor in mind
This project introduces the tactile rhythm of texture painting – the dance between control and spontaneity that defines this art form.
Even experienced painters run into challenges with texture. Here are a few common missteps and simple ways to correct them:
Remember – texture should enhance your story, not distract from it. Subtlety often speaks louder than excess.
Q: Can I use oil paint instead of acrylic for texture painting?
Yes. Oil paint works and is historically used for techniques like impasto and sgraffito. Just note oils dry slower and you’ll need to wait between layers.
Q: Do I need a canvas or panel for texture?
A rigid panel is better if you’re using heavy layers (modelling paste, sand) to avoid warping. A stretched canvas works for lighter texture.
Q: Will the texture show up when I hang the piece far away?
Yes-but you may need more pronounced ridges or larger texture scale if viewers view from several feet. In décor applications, test the piece in its hanging space.
Q: How do I clean textured wall art?
Use a soft duster or gentle wipe (if finish allows). Avoid pressing into the ridges.
Q: How do I pick textured art if I’m buying rather than making?
Look at surface close-up photos. Ask what technique was used (e.g., palette knife, mixed media, sand). Choose textures that complement your space: soft and subtle rather than aggressive in minimal settings, more pronounced in industrial or eclectic design settings.
Now that you’ve learned the basics and favorite techniques of textured painting, it’s time to dive into experimentation. Start small – pick one or two methods that excite you the most, whether it’s working with a palette knife or layering mediums, and try them on a test canvas.
Pay attention to how light interacts with each texture and how your brushstrokes feel as they build. As you grow more confident, push yourself to combine techniques and create your own. Texture painting is about exploration rather than perfection – each surface offers a new lesson. So keep experimenting, trust your instincts, and let the art of touch guide your creative journey.
If you feel inspired by these texture techniques, consider trying one yourself or exploring ready-made textured wall art that showcases these methods. On our site My Home Art & Decor, we feature a textured nature wall art collection designed for nature-inspired, organic interiors. Use these ideas to select a piece that complements your space.
For any questions about technique or custom orders, don’t hesitate to reach out through our contact page.
At its heart, textured painting is about sensation – the feeling of pushing paint, of seeing light dance across a surface you built with your own hands. Not only that, but every groove, every uneven edge carries part of your creative fingerprint. Consequently, by using texture paint, you can add depth and dimension to your artwork, thereby creating a unique experience that draws viewers in and invites them to explore every part of the textured surface.
It invites you to slow down, to connect with the physical act of making art. Texture teaches patience, presence, and the beauty of imperfection. So the next time you approach a blank canvas, think not just of color – but of touch. Ask yourself: What do I want this painting to feel like?
Because in the end, the art of touch is what transforms a painting from something you look at… into something you truly feel. Accordingly, to create texture, consider using a variety of tools – for example, a palette knife or a brush to apply different layers of paint, each with its own unique texture effects.
So clear your workspace, grab your tools, and simply start small. Push the paint around, and see how it moves. As you go, you’ll discover your own texturing techniques – for example, adding sand or flour to your paint to create a heavy texture, or using a putty knife to apply a thick layer of texture paste. Moreover, experimenting with different mediums like acrylic and oil paint can also yield fascinating results. Finally, with plenty of paint on your brush or knife, you can create a textured finish that feels completely your own.


Sign up to grab 10% off your first order and be the first to hear about new drops and exclusive deals!